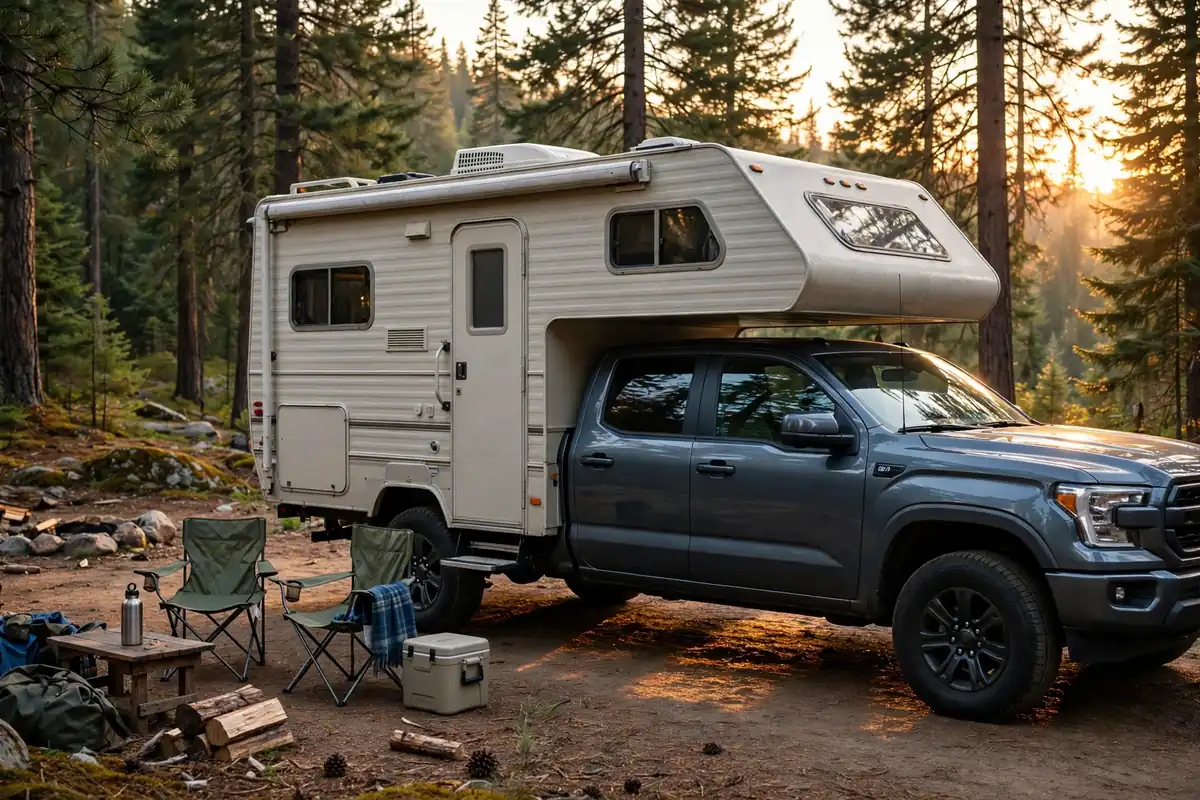
The Annual Truck Camper Maintenance Schedule: What to Do and When
Every spring I watch the same thing happen in the campground: a truck camper owner pulls the rig out of storage, finds a soggy mattress in the cabover, and realizes the leak started months ago. A proper truck camper maintenance schedule would have caught it in twenty minutes. I keep one now, and it has saved me from exactly that kind of spring surprise more than once.
Here is what most generic RV lists get wrong: a slide-in truck camper lives a harder life than a travel trailer. It flexes on the truck bed, it hangs over the cab catching full sun and wind, and it gets loaded and unloaded — which means jacks, turnbuckles, and seals take a beating regular RVs never see. This schedule is built around that reality, season by season, with the jobs I actually do and the ones owners keep telling me they wish they had done sooner.
A truck camper maintenance schedule is not an RV maintenance schedule
A travel trailer sits on its own frame, hitched occasionally. A truck camper gets cranked up and down on four corner jacks, torqued by a moving truck bed, and wedged against a bulkhead every time you load it. So the annual routine has items you will not find on any RV-generic checklist: turnbuckle tension checks, jack service, tie-down anchor inspection, cabover nose-seam checks, and bed-mat condition. Skip the camper-specific jobs and the generic ones will not save you — the failure comes from the parts only a truck camper has.
Spring: the de-winterize and inspect reset
Spring is the biggest maintenance day of the year. I block out a full Saturday and treat it as commissioning. Go slow and go in order, because a skipped step here is the thing that breaks at the worst moment in July.
Flush and sanitize the water system. If you ran antifreeze through the lines in fall, flush every faucet — hot and cold — plus the toilet and the outside shower until the water runs clear. Then sanitize: a quarter cup of plain unscented household bleach per 15 gallons of fresh tank capacity, fill the tank, run each fixture until you smell bleach, let it sit at least four hours (overnight is what most owners do), then drain and flush until the bleach smell is gone. Forest River owners who do this every spring say the spots people forget are the outside shower and the low-point drains. Take the water heater out of bypass, reinstall the anode rod or plug, and fill the heater completely before firing it — lighting a dry tank can kill the element or crack the tank.
Inspect every seal and seam. This is the single most important job on the list. Water intrusion is the number one killer of truck campers, and owners who stay ahead of it all repeat the same cadence: a full seal inspection every three to six months, minimum twice a year — once at spring commissioning and once before winter storage. Walk the roof, the cabover nose, every corner seam, window frames, clearance lights, vent fans, and the jack bracket mounts. One Forest River forum owner traced months of cabover dampness to five leaking clearance lights above the cab; by the time the water showed inside, it had softened the front jack mounts. Water travels — where you see the stain is almost never where it got in. If your roof seams need attention, our roof leak repair guide walks through the full process.

Check the turnbuckles. Pop the access panels and check all four. On the first trip of the season especially, check them again after 25 to 50 miles — a Four Wheel Camper owner manual tip that owners on the forums confirm from experience: new setups loosen as everything settles. I do the wiggle test one owner described: if I cannot wiggle the turnbuckle, it is good. If it moves, it gets tightened. A jamb nut on each turnbuckle is the popular fix for chronic loosening. Then look at the anchors themselves: eye bolts in the bed, tie-down inserts, backing plates. Climb under the truck and check the bed-side hardware for bending or distortion — worn hardware shows up as bent steel before it shows up as a failure. See our tie-down and turnbuckle comparison for the systems this matters most on.

Check the bed mat. Pull the camper, pull the mat, and look at both. A rubber mat lasts a decade or more, but it is also where moisture hides: one installer crew recommends removing the mat at service time because it can slow drainage under the camper. Check for mold on the mat and the bed paint under it, and make sure the camper floor bottom is clean and dry before it all goes back together.
Test every detector and the extinguisher. Smoke, CO, and propane detectors all get fresh batteries in spring, and I check the manufacture dates — most units expire at five to seven years, long before they stop chirping. Press the test buttons, make sure the fire extinguisher gauge is still in the green and the pin is intact.
Early summer: jack service season
Jacks are the most truck-camper-specific hardware on the rig, and the most neglected. Everyone remembers to use them; almost nobody maintains them. Early summer, before your first long trip, give them a real service.
Run them through their full range. Extend and retract each jack fully, listening for grinding, skipping, or a motor that strains. If you have HappiJac electric jacks, the owner’s manual has a warning most people miss: retract the jacks to about one inch from the hard stop when traveling, and if a jack hits the stop, back it off an inch — jacks left jammed against the hard stop for long periods can become bound and hard to free. The wireless remote manual says the same thing another way: never leave a jack fully retracted; after retracting for travel, bump the motors to extend each jack slightly. I keep the HappiJac camper jack owner’s manual saved on my phone for exactly this reason.
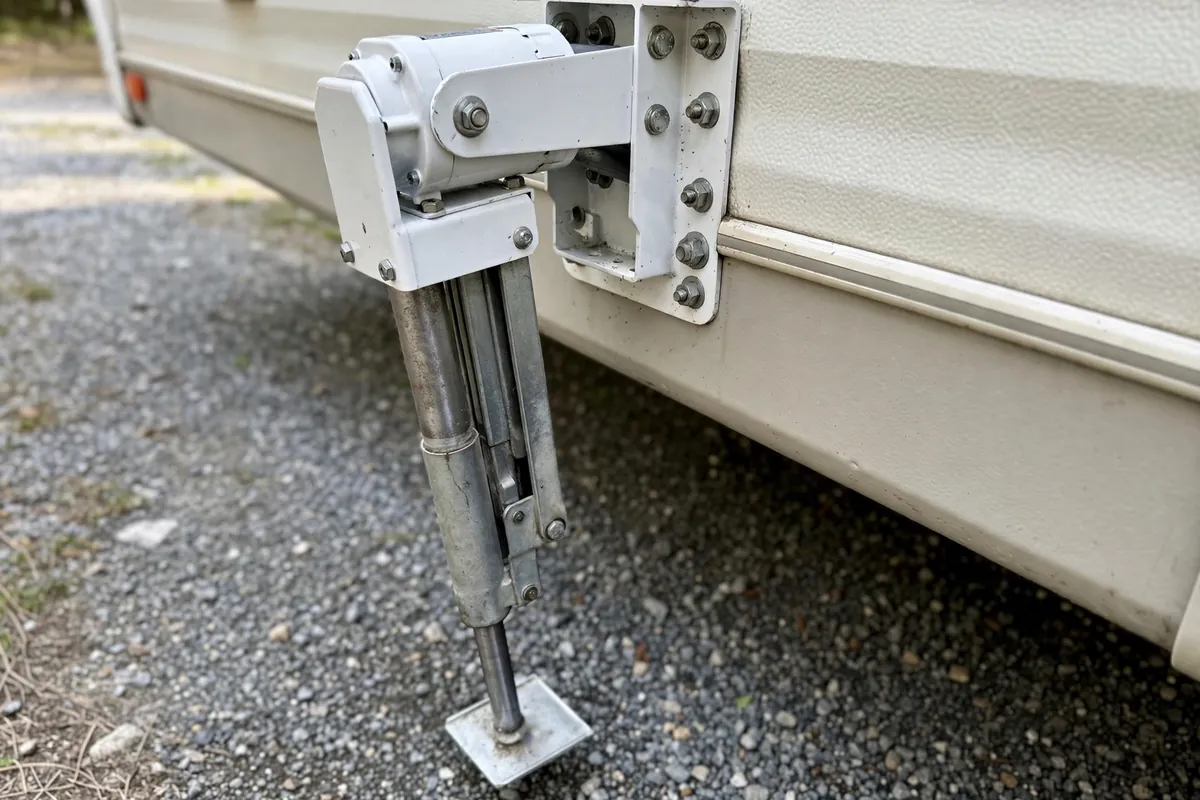
Grease what the manual will not tell you about. Owners who have taken seized HappiJacs apart report the same culprit: the thrust bearing under the support plate rusts and locks up, because the manufacturer’s recommended few drops of oil on top of the jack never reaches it. One owner drilled small lube holes and fed in winter-grade oil to free a jack that would not move after a season of sitting; another documented on YouTube how a seized jack cost him a camping weekend and could have cost him far more. You do not need to drill anything. A yearly routine of running each jack full travel a few times, wiping down the inner leg, and applying a light oil or silicone to the visible threads and pivot points goes a long way. If a jack starts sounding labored, service it immediately — that sound is the warning, and the repair is always cheaper than the failure.
Check the jack mounts. Look at every bracket, every bolt, and the corner of the camper where each jack attaches. The soft-jack-mount story from the clearance-light leak is exactly why: water-softened wood at a jack corner plus a camper swaying on four jacks is a structural problem. Tighten loose mounting bolts and reseal any bracket-to-wall seam that looks suspect.
Safety note: never work under a camper supported only by its jacks, and never operate jacks on soft or unlevel ground without solid pads. A camper falling off its jacks is a life-altering accident, not a repair bill.
Mid-summer: the systems that fail quietly
By mid-summer the rig is in regular use, which is exactly when the systems you never look at start failing. This is the quarterly maintenance block — quick checks, not weekend projects.
Batteries and solar. Flooded lead-acid batteries need water checks and terminal cleaning; lithium batteries need their firmware-free attention paid differently — keep them cool, keep the charge controller settings right for the chemistry. If your rig has solar, hose off the panels and check that mounting hardware is tight and wiring shows no UV cracking. Batteries are the heartbeat of the whole camper; if yours are getting weak, our solar and lithium sizing guide covers what the upgrade actually involves.
Fridge, water pump, and propane. Run the fridge on each power source for a day and confirm it holds temperature. Exercise the water pump and listen for the short-cycling that means a failing pressure switch or a small leak somewhere in the plumbing. Leak-check propane fittings with soapy water at the tank, regulator, and every appliance connection — the soapy-water test is still the gold standard because it is simple and it works. If you smell propane, shut the tank off and fix it before using the camper again.
Ventilation and condensation. Mid-summer is when condensation sneaks up on owners who run the AC hard and shower inside without venting. Run the vent fans during and after showers, crack a window at night, and check under the cabover mattress for the first signs of mold — that is the canary in the coal mine. Our condensation control guide covers the full prevention routine.
Fall: reseal season and winterize
Fall is the second big maintenance day, and for leak prevention it matters even more than spring. Winter weather punishes every weak seam, and freeze-thaw cycles open cracks you cannot see yet.
The second seal inspection. Do the same walk you did in spring, and touch up any sealant that cracked, pulled away, or bubbled over the summer. Self-leveling Dicor lap sealant is what most owners keep on hand — a tube runs roughly ten dollars at RV supply shops — and a couple of tubes plus a dry afternoon covers most touch-ups. For seams that keep cracking, many owners swear by Eternabond tape as the permanent fix: one forum regular applied it over roof seams years ago and reports it still looks new, while owners who stuck with Dicor alone describe reapplying every three to six months depending on sun exposure. Do not use silicone on the roof — nothing sticks to it later, including more silicone.
Service the jacks before storage. Wipe the legs clean, extend and retract each jack a few times to distribute any lube, and store the camper as low as the jacks allow — the HappiJac manual specifies maximum lateral stability comes from the least jack extension, and a camper stored on fully extended jacks sways in wind and strains the corner brackets.
Winterize the plumbing. Drain everything, blow the lines with air (no more than 30 psi at the city water inlet), bypass and drain the water heater, then pump pink RV antifreeze through until it shows at every fixture — hot and cold — plus the toilet, outside shower, and P-traps. The failure stories are consistent: one owner forgot antifreeze through the hot water low-point drain and burst a pipe that winter; another says the first thing to freeze on his rig is always the toilet valve, replaced about every third year no matter what. Do not skip this because of a mild forecast — a single hard freeze can split fittings inside a wall and turn spring into a four-figure repair. Full walkthrough in our truck camper winterizing guide.

Battery and critter prep. If the camper sits all winter, pull the batteries or put them on a proper maintainer — a dead-flat flooded battery often does not come back. Stuff steel wool or mesh in exterior openings, pull anything edible out of the cabinets, and set traps or deterrent in the storage area. Mice do more damage to wiring and insulation in one winter than most owners believe possible.
Winter: the stored-camper check

A stored camper is not a maintenance-free camper. Once a month, walk the outside: look for standing water or snow load on the roof, check the cover has not torn or shifted, peek inside for moisture on the windows and any sign of rodents. Crack a roof vent open a notch to keep air moving — a sealed-up camper in storage grows mold fast. Cycle the jacks a few inches once mid-winter to keep them from sitting in one position all season; this is cheap insurance against the binding the HappiJac manual warns about. Top up battery maintainers and check the charge monthly.
The year at a glance
| Season | The non-negotiables |
|---|---|
| Spring | Flush and sanitize water, full seal inspection, turnbuckle check + recheck at 25–50 miles, bed mat inspection, detectors and extinguisher |
| Early summer | Jack full-range exercise, lube, mount inspection |
| Mid-summer | Batteries, solar, fridge, pump, propane fittings, condensation check |
| Fall | Seal touch-ups (Dicor or Eternabond), jack service + low storage, winterize plumbing, battery maintainer, critter-proofing |
| Winter | Monthly walk-around, moisture check, jack cycling, battery charge check |
What neglect costs (rough ranges, not guarantees)
Every maintenance item on this list is cheap compared to the repair it prevents. A few tubes of sealant and an afternoon keep water out of walls; a Camping World 2026 pricing guide puts professional spot resealing at $150–$700 and a full reseal at $400–$1,500+, while a leak that reaches the structure runs $200–$2,000+ — before rot or delamination enter the picture. Professional winterization typically starts around $179, versus a DIY job costing a few jugs of antifreeze. And the big-ticket cautionary tales: an owner cost log on the RV forums lists a $1,400 fridge replacement, $1,800 for wheels and tires, and $1,300 for lithium batteries — the kinds of expenses that follow when systems are run to failure. Treat those as realistic context from fellow owners, not quotes: your shop, your rig, your prices will differ. An hour of maintenance in October beats a month in the shop in May, every single year.
FAQs
How often should I inspect the sealant on my truck camper?
Every three to six months, at minimum twice a year: once at spring commissioning and once before winter storage. That is the cadence experienced owners converge on. Sun-heavy southern climates need the shorter end of that range — UV degrades lap sealant fast. Touch up cracks as you find them; do not wait for a scheduled date when you spot one.
Do I really need to service my camper jacks every year?
Yes. Running each jack through its full range, cleaning and lightly lubricating the legs, and checking the mounts takes about an hour and prevents the two most common failures: seized thrust bearings and bound hard-stop positions. HappiJac’s own manual warns that jacks left jammed against the hard stop can become bound and difficult to free — store them about an inch from the stop.
How often do turnbuckles need checking?
Check all four every time you load the camper, again after 25–50 miles on the first trip, and before every long drive or after bumpy roads. The Torklift tension guide recommends roughly 300 pounds of tension via the spring indicator. Owners who skip the recheck find turnbuckles nearly two turns loose — one found a rear turnbuckle missing entirely after a trip.
What happens if I skip winterizing for one mild winter?
It is a gamble, and the stakes are high. It only takes one hard overnight freeze to split a fitting inside a wall, crack the toilet valve, or destroy the water pump — failures that show up when you pressurize the system in spring. Professional winterization starts around $179; the repair for a freeze-split line inside a wall can run four figures. Owners who winterize faithfully still report losing a toilet valve every few years. Do not skip it.
How long does a full truck camper maintenance day take?
Spring commissioning and the fall winterize-plus-reseal days each take roughly half a day for a reasonably handy owner — four to six hours including the water system work. The mid-season checks are an hour or less each. Budget one full weekend a year across all seasons and you cover everything on this truck camper maintenance schedule.
Is Eternabond tape really better than Dicor sealant?
They solve different problems. Dicor self-leveling lap sealant is the standard for sealing around roof penetrations and touch-ups, and a tube is cheap. Eternabond tape is what owners reach for when a seam cracks repeatedly — applied over a clean, prepped seam it lasts for years without reapplication. Many owners use both: Dicor for penetrations and repairs, tape for the long problem seams. Match the sealant to your roof type and never put silicone on an RV roof.