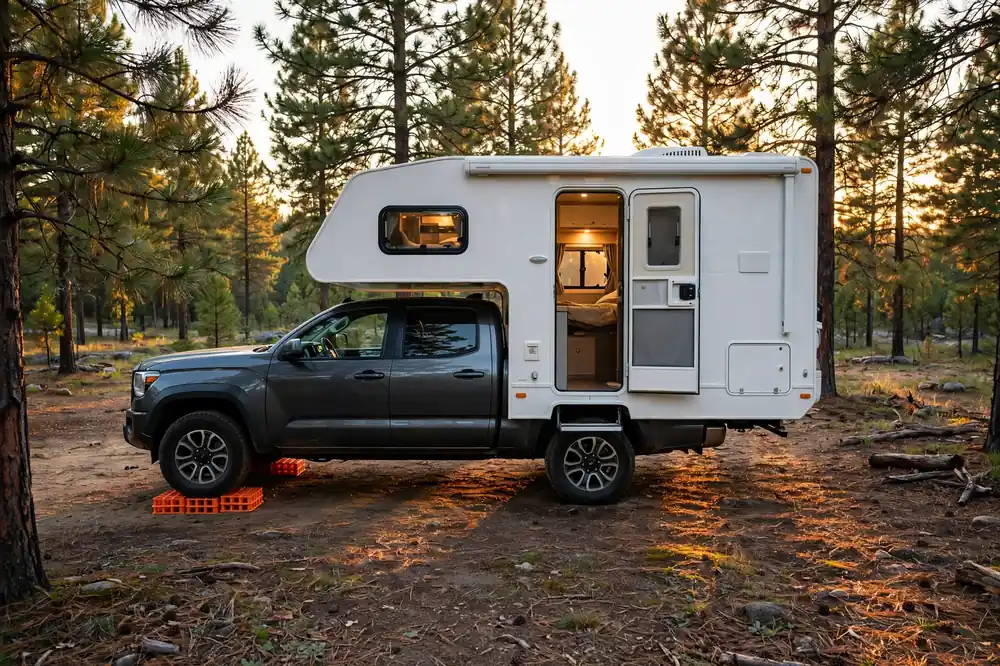
How to Level a Truck Camper on Uneven Ground
I learned how to level a truck camper the embarrassing way: parked nose-down on what looked like flat gravel, woke up sliding toward the cabover all night, and found the fridge warmer than it should have been by morning. The site was not flat at all. My eyes had just gotten used to it.
That is the point of leveling. You are not chasing perfection. You are getting the camper close enough that you sleep well, the doors work, water drains properly, and — if you have an absorption fridge — the cooling unit is not quietly suffering. With a simple routine, it takes five to ten minutes.
Why leveling matters more than it looks

Start with the fridge, because that is the one that can cost real money. Most absorption fridges — the propane/120-volt kind in many slide-in campers — work by gravity. Liquid must flow through the cooling unit, and a tilt disrupts that flow. Norcold’s manuals put the limit plainly: within 3 degrees off level side-to-side and 6 degrees front-to-back, as you face the front of the refrigerator. Stay past that for a long stretch and you risk permanent damage, not just warm food.
That rule is about the fridge itself, not your truck. If the fridge is mounted sideways, the truck’s side-to-side lean may be the fridge’s front-to-back lean. Aim for genuinely level in both directions, and check a small level on a fridge shelf if you want to be sure. Compressor fridges are different: they use a pump, so they tolerate tilt much better. Check your own manual before assuming either way.
Sleep is the reason you notice first. Even a small slope turns a cabover bed into a slow slide. I would much rather sleep head slightly higher than feet, and owners in truck-camper forums say the same again and again. Doors tell you the rest: a door that swings shut on its own, or a shower drain that pools, is often a leveling problem before it is a hardware or plumbing problem.
For a night or two, my standard is simple: inside the fridge’s 3-degree/6-degree window, level enough not to slide in bed, and level enough that doors stay put. A bubble level is enough. Measure in the same place each time — the floor near the door, or better, inside the fridge.
Assess the slope before you touch a block
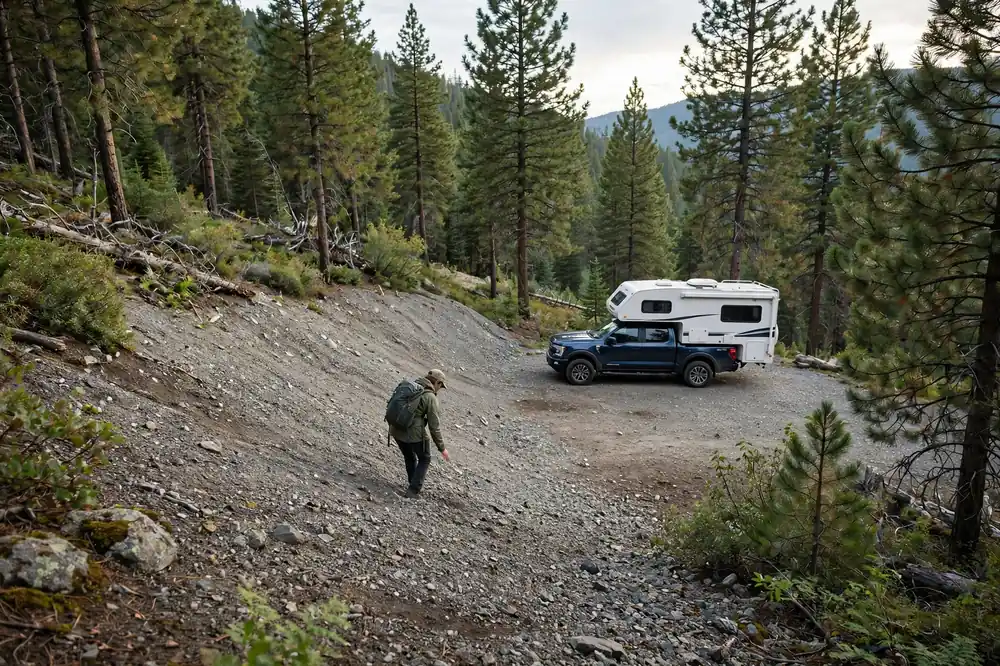
Park where you want to sleep, set the brake, and read the level. Read side-to-side first, because that is the hard direction: you fix it by driving the low-side tires up onto something. Then read front-to-back, which is usually easier, because rolling a few feet often changes it.
Walk the site first. Look at where the tires will sit, kick away loose rocks, and check for soft spots, ruts, and drainage lines. Good gear will not save a setup where one tire sinks into soft dirt while the other sits on a rock. On a dispersed site this matters even more — dispersed spots are rarely graded, and the flattest-looking patch is often the one that floods first.
Here is the rule that saves the most time: if you need more than about 3 to 4 inches of lift on one side, move. Reposition within the site, or pick another site. Owners on truck-camper forums report the same cutoff: beyond three blocks high, the stack gets tippy, the step gets awkward, and you are fighting the site instead of camping on it. A small ramp is normal. A staircase means move.
Try not to park with the door on the downhill side, where the step gets steeper and the doorway turns to mud in rain.
If you camp solo, a Bluetooth sensor helps. The LevelMatePRO system sends the level reading to your phone, so you can see how many inches low each corner is from the driver’s seat.
How to level a truck camper side-to-side first
Always do side-to-side first. Rolling forward or back a foot changes front-to-back without undoing side-to-side work, as long as both tires on the same side stay on their ramps.
- Park roughly where you want to be, brake on, read the level.
- Work out which side is low, and by roughly how much.
- Put ramps or blocks in front of (or behind) the low-side tires, depending on which way you will roll.
- Roll slowly onto the ramp, spotter watching if you have one, and stop when the bubble reads true.
- Chock the tires, brake on, truck in park or in gear. Then check front-to-back.
Never roll onto blocks with someone standing in front of the tire, and never use a stack taller than it is wide. If it wobbles when you step on it, it will wobble worse under a loaded tire.
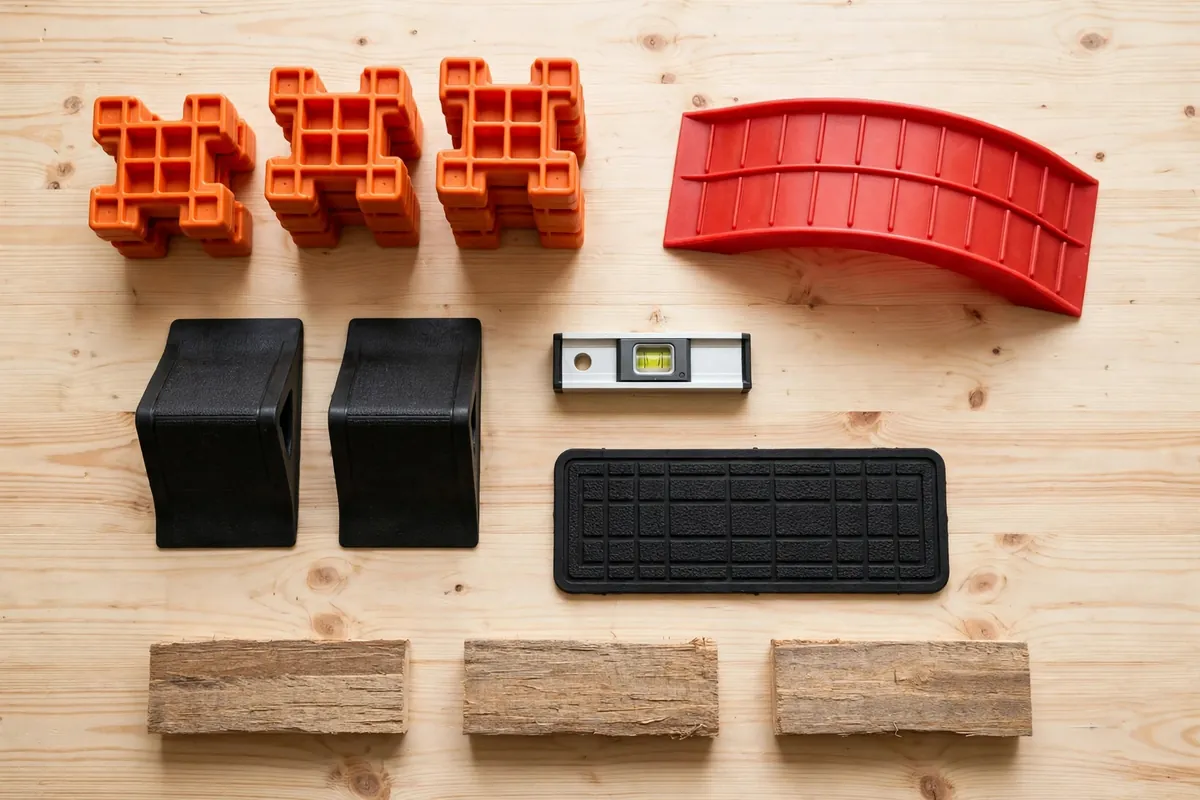
Lynx-style interlocking blocks
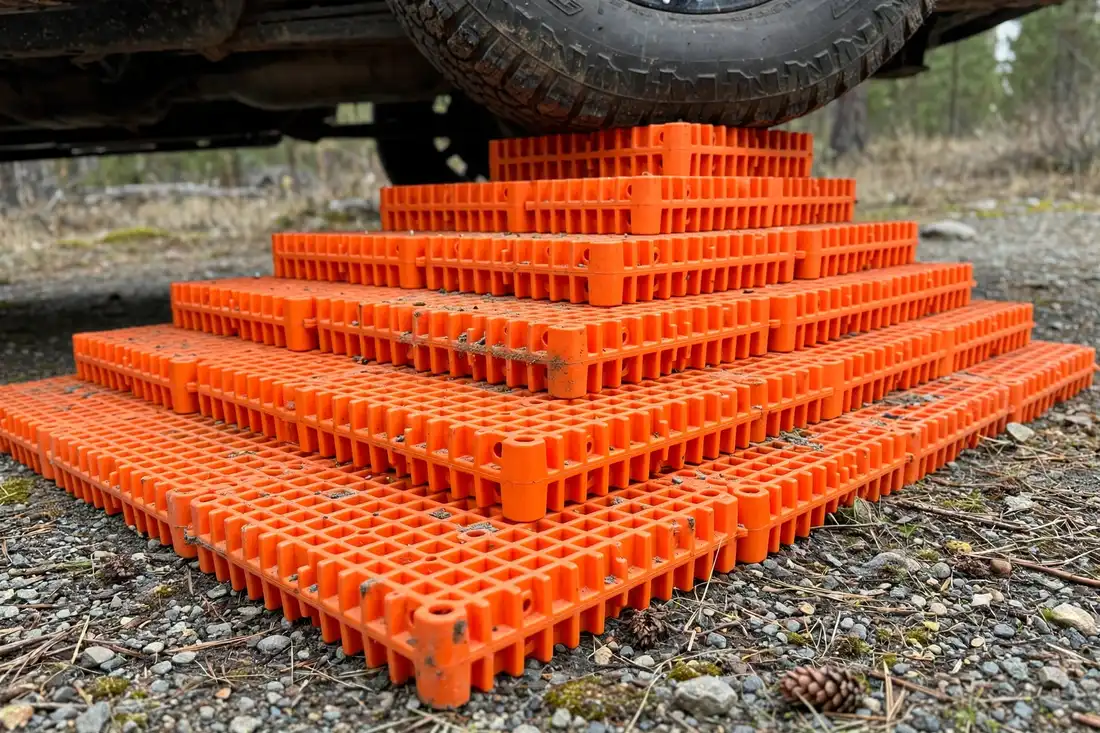
These orange interlocking blocks are where most campers start, for good reason. Tri-Lynx lists each block at 8.5 by 8.5 inches, with 1 inch of lift per block when interlocked, and the set is light enough to live in a storage bin. Build a pyramid — wide at the bottom, narrower at the top — and drive up it. The tire must sit fully on the top block, not half on and half off, and the stack should be wider than you think you need on soft ground.
Blocks have one weakness: fixed steps. If you need an inch and a half, you must choose one inch or two. Owners on RV forums report exactly this — the lowest lift is a full inch, sometimes a little too much. Carry a couple of thin plywood squares for those in-between heights. A half-inch shim turns a frustrating choice into a level camper. On soft dirt, grass, or sand, put a board or rubber mat under the stack first. Owners report levelers popping out or sliding on wet grass, and a mat underneath is the fix they keep coming back to.
Andersen-style curved levelers
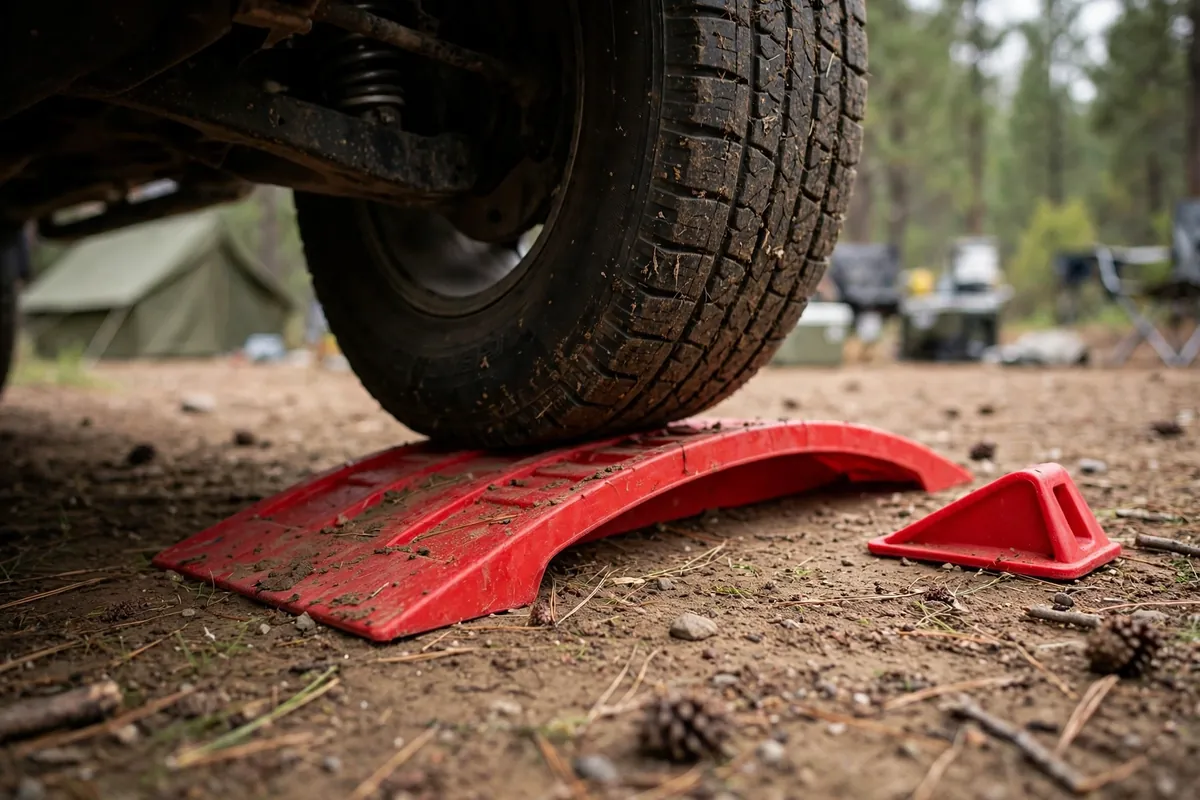
A curved leveler is a single wedge you drive up. The farther you roll, the higher you go — Andersen lists its Camper Leveler as giving fine adjustment from about half an inch up to 4 inches — then you jam the matching chock behind the tire. No guessing how many blocks you need: stop when the bubble says stop.
That is why many experienced owners prefer them side-to-side, especially solo. You do not drive off, add a block, and drive on again. You inch forward or back until level. If you overshoot, inch back down. The chock is part of the system, which helps on a slope.
Know the limits before buying. The curve suits tires up to about 31 to 32 inches, per Andersen’s own listings; much larger tires will not sit properly on it. On very soft ground the narrow wedge can sink or scoot, so use the rubber mat that comes with the kit. And 4 inches is the ceiling — beyond that, move the truck. Put one leveler under each tire on the low side, front and rear, so the whole side rises evenly. Lifting only one tire twists the truck and camper, and the door will tell you.
Wood boards: the cheap, heavy, honest option
Two-by lumber still works. A pair of 2×8 or 2×10 boards, about 18 to 24 inches long with one end beveled at 45 degrees, will level most sites. Stack them longest on the bottom, shortest on top, and drive up slowly. Wood is cheap and easy to replace anywhere, but it cracks on uneven ground where only part of the board is supported, and it gets heavy when waterlogged.
Owners on the WanderTheWest forum report a fix I have copied: put a strip of rubber stall mat under the boards first. The mat spreads the load, stops boards snapping over a rock or dip, and adds grip on soft ground. Other owners there report switching from pressure-treated decking, which splits and soaks up water, to lighter plastic trim boards for the same reason. Either way, the board is only as good as what is underneath it. Bevel the leading edge, keep boards wider than your tires, and retire any board cracked through.
Front-to-back: use the truck, not the jacks
Once side-to-side is done, front-to-back is usually a smaller job. In a slide-in camper, the truck is the tool for this direction. Rolling forward or back a few feet often changes the reading enough, because ground is rarely a perfect slope in one direction.
If the nose is still low, roll to a flatter patch — even a foot or two helps — or ramp the low axle with the same blocks or levelers, keeping lift even across the axle. Parking nose slightly uphill is fine if that is how you sleep best, as long as the fridge stays in its window.
Do not reach for the camper jacks to fix lean while the camper is still on the truck. Slide-in camper jacks are for loading, unloading, and stabilizing — not for lifting a loaded truck and camper. They are not built to carry that combined weight at an angle, and using them that way stresses the jack brackets and frame. Level with the tires. Stabilize with the jacks.
Air bags vs. jacks: what each one can actually do
Air bags and jacks both move the camper up and down, but they are not interchangeable. Air bags — air springs helping the rear suspension carry the camper without sagging — can trim ride height a few inches. Some owners report nudging the camper a few inches fore-and-aft with rear air suspension at camp, and that can work as fine adjustment. But air bags are not a leveling system: they will not fix a real side-to-side slope, and they can settle overnight.
Think of air bags as ride and load control first, camp leveling second. Air bags, Timbren bump stops, and SumoSprings all solve different parts of the same problem, and none replaces blocks under the tires at camp.
Jacks do a different job at camp. Once level on the tires, lower them just enough to take bounce out — snug, not lifting. If a jack starts unloading a tire, you have gone too far; back it off until the tire carries its weight again. My rule: tires level, jacks stabilize, air bags carry.
Leveling a camper off the truck on stands
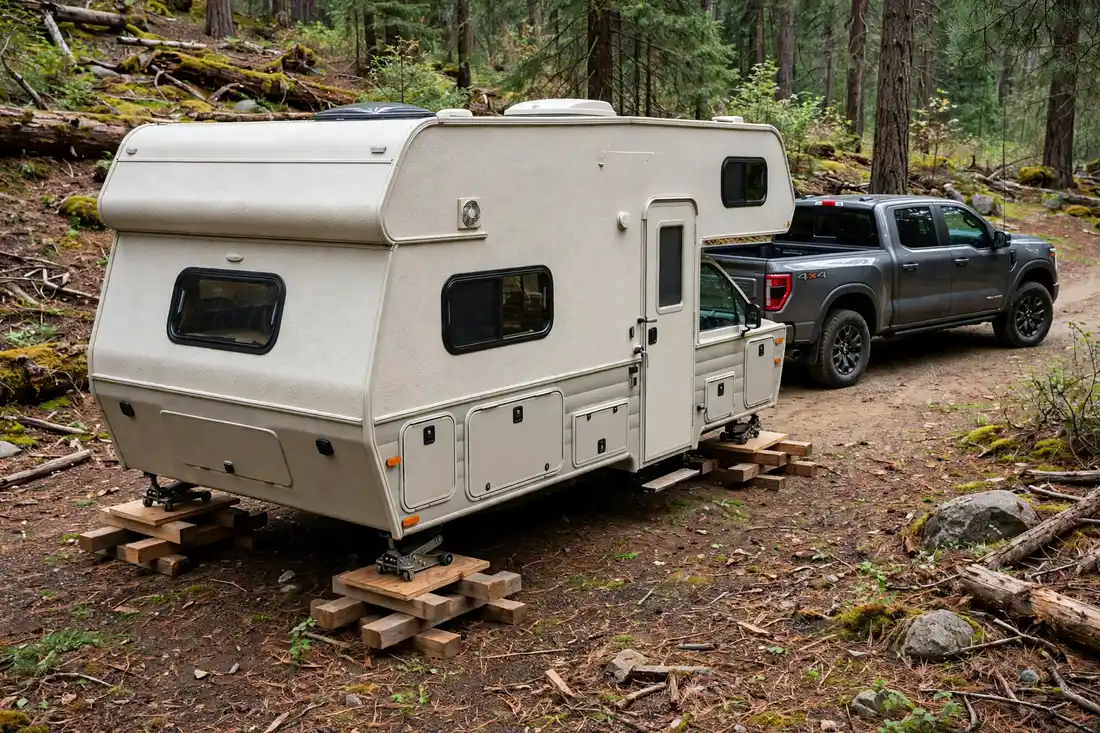
Sometimes you want the camper off the truck: to drive around without breaking camp, or to stay put a while. It is possible, but slower, with its own safety rules. Never leave a camper standing high on extended jacks. Lower it as close to the ground as possible — the closer to the ground, the more stable it is. Keep the front slightly higher than the back while loading or unloading, so weight does not shift suddenly over the front jacks. Never lift the camper fully off the truck just to level it, unless you are taking it off and lowering it close to the ground.
- Level the truck first, before you unload. If the truck is close to level on blocks, the camper comes off close to level.
- Unload onto firm footing. Put wide pads or boards under each jack foot first. On soft ground a foot sinks overnight and takes your level with it. Owners on Good Sam forums report using crossed 4x4s with a 4×6 on top, or cut logs, under the rear on a sloped primitive site, so they do not extend the rear jacks so far. Same principle: shorten jack extension with solid blocking, and the setup gets more stable.
- Lower in small, even steps. Front a little, rear a little, check, repeat. Dropping one corner all the way twists the camper and overloads one bracket.
- Level with blocking under the feet, not by cranking one jack high. If a corner is low, add blocking under that foot. Shorter extension means less sway and stress.
- Support the floor, not just the jacks. For more than a night or two, add sawhorses or cribbing under the floor toward the outside edges. Some older camper manuals say it plainly: do not leave the camper standing free on its four jacks alone.
- Guard against creep. On a slope, a camper on jacks can shift downhill. Owners on WanderTheWest report bracing jack legs together and, where possible, anchoring the camper to another vehicle with a strap when unloading on a slope, to stop jacks “walking” downhill. At minimum, keep it low, on wide pads, and never high and unattended in wind.
If the slope needs tall cribbing to get level, stop. Keep the camper on the truck and level with the tires, or move to flatter ground. I will not sleep in a camper on tall, uneven cribbing, no matter how solid it looks at noon.
For the full unloading sequence, the step-by-step solo unloading process is worth reading before your first off-truck night. And whether you can actually use a truck camper off the truck is a separate decision from leveling it.
Common mistakes that undo good leveling
- Leveling with the jacks while still on the truck. The most common mistake I see. Jacks are not a leveling system for a loaded camper.
- Forgetting to chock. Blocks hold height, not the truck. Chock the tires not on ramps, brake on, truck in park or gear. On a slope, chock both sides if you can.
- Stacking too tall and narrow. A pyramid taller than its base is a tip waiting to happen. Need more height than a stable stack gives? Move the truck.
- Never rechecking. Tires settle, blocks sink, air bags leak down. Recheck after the first night, after rain, and next morning.
- Leaving turnbuckles tight while lifting off the truck. Tie-downs must come off first, or you will damage tie-downs or brackets. Tie-downs have their own setup logic, starting with knowing when they should be loose.
- Trusting the ground instead of the level. Grass hides dips; gravel looks flat until a tire sinks. Always read the level.
- Forgetting the step. A camper three inches up on one side has a three-inch taller step on the other. Bring a stable step for the dark.
My quick campsite routine
- Walk the site. Pick the flattest patch that is not a drainage line.
- Park, brake on, read the level side-to-side and front-to-back.
- If I need more than 3 to 4 inches on one side, reposition or move.
- Ramp the low-side tires. Roll on slowly, spotter watching.
- Chock, brake, park. Recheck.
- Fine-tune front-to-back by rolling a foot or two, or ramping the low axle.
- Lower jacks just enough to take bounce out — snug, not lifting.
- Check fridge level, door swing, and step height.
- Recheck after settling, after rain, and next morning.
The first few times it feels fussy. By the fifth site, it is muscle memory. Keep the kit together and check it as part of regular upkeep. A seasonal maintenance pass catches cracked blocks and soft jack pads in the driveway, not at dusk.
Frequently asked questions about leveling a truck camper
How level does a truck camper need to be?
Inside the absorption fridge’s 3-degree side-to-side, 6-degree front-to-back window (as you face the fridge), level enough not to slide in bed, and level enough that doors stay put. Dead level is ideal; genuinely close in both directions is the practical target.
Do I level side-to-side or front-to-back first?
Side-to-side first, always. It is the bigger move — driving low-side tires onto ramps. Front-to-back is usually smaller: rolling a short distance, or ramping one axle.
Can I level a truck camper with the camper jacks?
No, not on the truck, and not instead of blocks under the tires. Jacks are for loading, unloading, and stabilizing. Level with tires, then snug the jacks to reduce bounce. If a jack unloads a tire, back it off.
Are Andersen levelers better than Lynx blocks?
They solve different problems. Curved levelers fine-tune in tiny increments without re-stacking, great solo on firm ground. Blocks are cheaper and easier to stack wide and stable, but work in roughly one-inch steps. Many owners carry both.
Can I use air bags to level my truck camper at camp?
Air bags can trim height a few inches and help a sagging rear, but they are not a leveling system. They will not fix a real side-to-side slope and can settle overnight. Use blocks or ramps under the tires for leveling.