Used Truck Camper Inspection Checklist: What to Check Before You Buy
The first used truck camper I ever went to look at nearly sold itself. The photos were gorgeous, the seller was friendly, the price was fair, and I was already mentally loading it onto my truck. Ten minutes in, my thumb went through a soft spot in the cabover ceiling the size of a dinner plate. Under the fresh paint, black mold ran all the way through the luan. I walked away feeling sick — not because I lost the camper, but because I almost bought it.
That is why this used truck camper inspection checklist exists: one list you can take to a driveway and work through top to bottom, built from my own inspections and what experienced owners learned the expensive way on the forums — the failures that cost thousands, and the five-minute checks that catch them. Print it, bring it, and check every box before money changes hands.
Before You Drive Out: Set Yourself Up for a Real Inspection
A real inspection takes 60 to 90 minutes and a tote bag of tools: a pinless moisture meter, flashlight and headlamp, a stepladder for the roof, a coin for the tap test, a screwdriver, and your phone for photos of questionable spots and the VIN plate. Print this list and bring a pen.
Call the seller the day before with two requests: start the fridge on propane the night before so it is cold when you arrive, and leave the camper off the truck on its jacks so you can inspect the underside. A seller who balks is not automatically dishonest — but it tells you something. Shopping the under-$15,000 market, where projects outnumber gems, these requests filter fast.
Set price expectations first: run the year, make, and model through the NADA RV values guide for the real market range. A seller asking clean-retail money for a camper with soft floors is a walk-away, not a negotiation partner.
Used Truck Camper Inspection Checklist: The Exterior, First
Water kills more used truck campers than every other problem combined. Every exterior check here asks one question a dozen ways: has water been getting in, and for how long?
Roof and sealant age
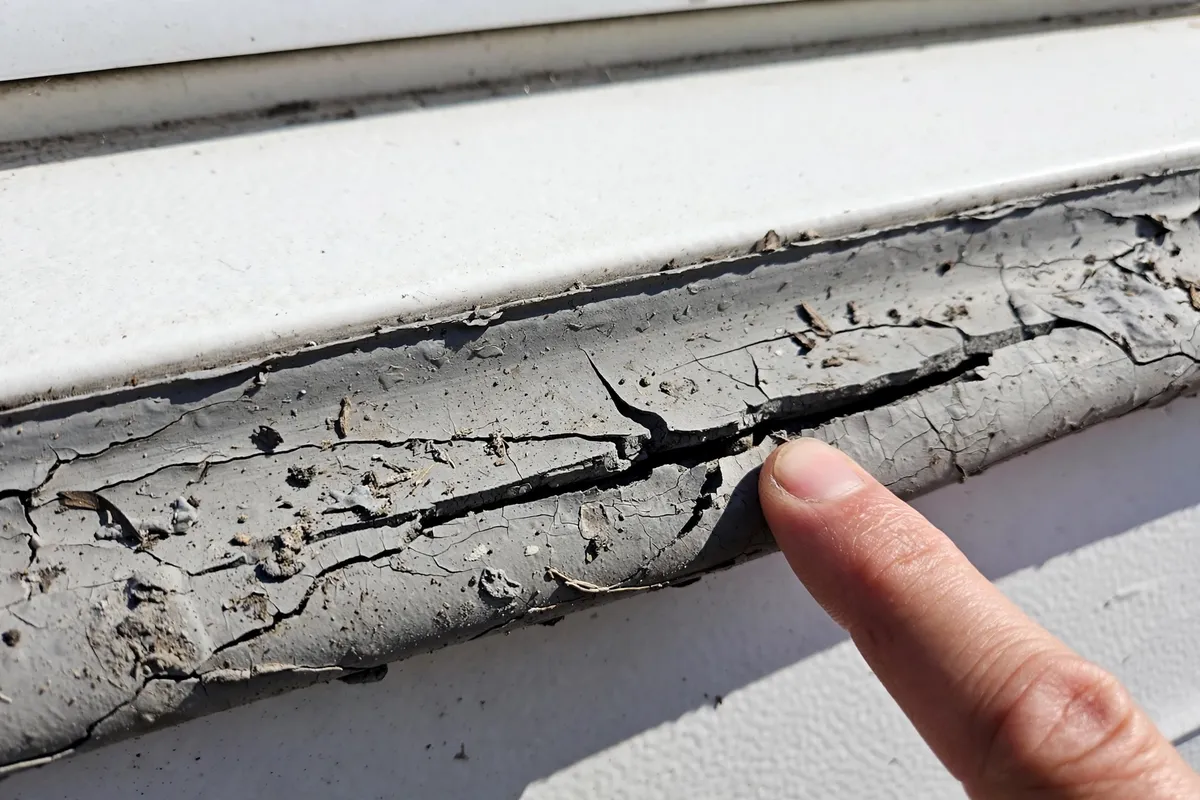
Get on the ladder and read the sealant like a biography of the last owner. Healthy lap sealant is pliable and stuck at the edges; dead sealant is cracked, chalky, or peeling — and every crack is a highway for water.
Owners on the Forest River forums note manuals call for inspecting seals every 2–3 months and resealing every 2–3 years — and almost nobody does it. People who have torn into rotten walls say delamination and rot commonly surface around year three on neglected units. You are not judging caulk. You are judging the owner.
Hit every seam: roof edges front and rear, every vent and the air conditioner, antenna and solar mounts, ladder mounts, and the spot sellers miss most — where the roof meets the cabover nose, which takes the full blast of highway rain. Rubber roof? Look for puckered, alligator-skin UV damage. Aluminum? Punctures and popped screws. A few cracks are a bargaining chip — a tube of lap sealant from the company that makes most of it fixes them. Failed sealant everywhere is a story about the interior you cannot see.
Walls: the delamination tap test
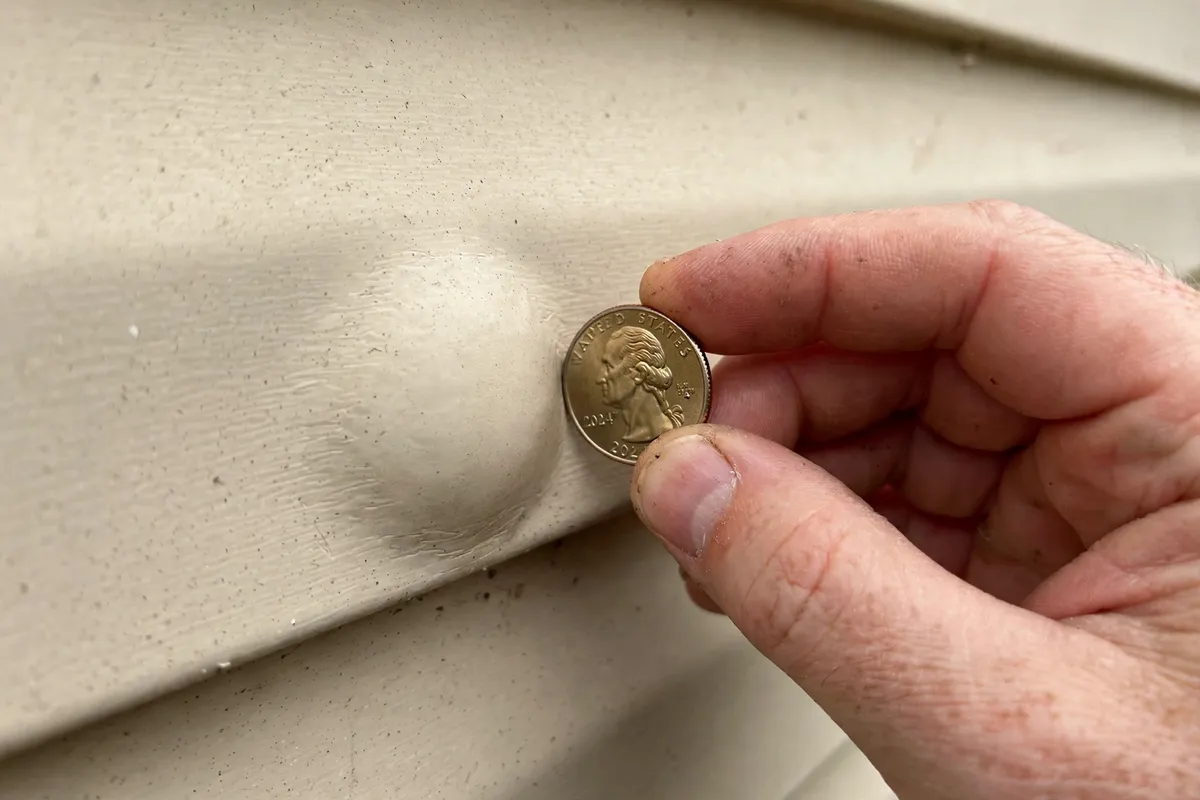
Walk every wall tapping lightly with your coin. Solid laminate sounds sharp and tight; delaminated areas sound hollow, like a drum. Compare any bubble against a known-flat area — a dull sound over a soft bubble means the skin has separated from the wood, and that repair is never small. Owners who have opened walls warn the hidden damage is usually two to three times what you see.
Press the lower sidewalls and around every window and compartment door — softness there usually traces to seals that failed years ago. Delamination starts at a penetration and spreads outward.
Windows, doors, and compartment doors
Open every exterior compartment and flashlight the interior side of the skin for staining, rusted fasteners, and repeat wetness. Every door should latch and seal tight. Check the window weep holes — clogged weeps cause the mystery leaks owners chase for years.
Study the entry door: if it needs lifting or slamming to latch, the wall or floor around it has moved. Confirm the seller has keys for every lock, including the exterior shower.
The underside and the base
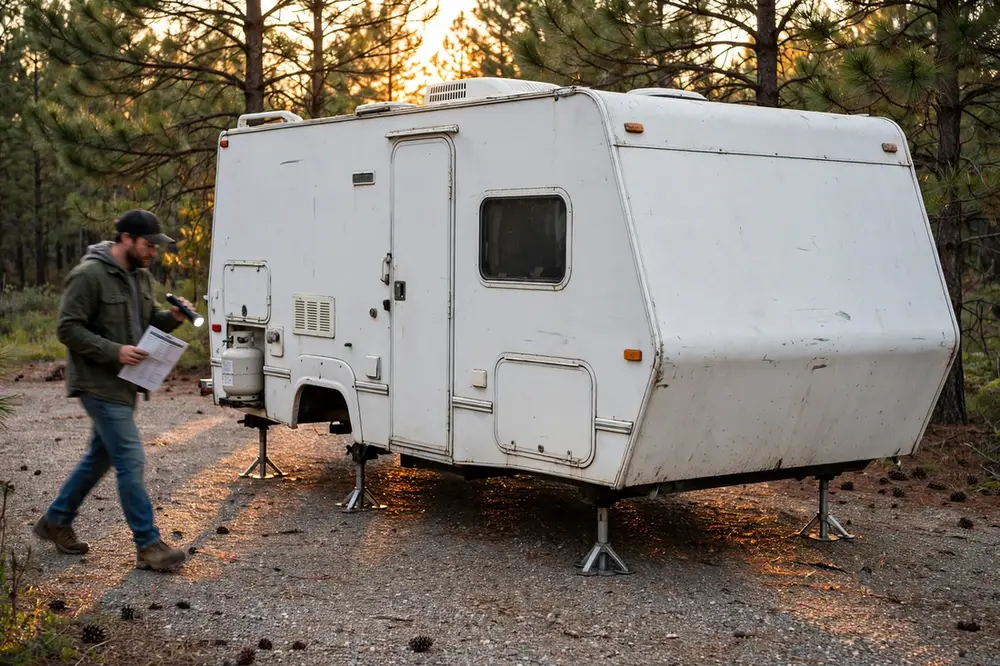
Crouch down and study the underside and bottom wall perimeter: dark staining on the wood base, thumb-dentable soft spots, musty smell off the underbelly. Sight along the bottom edges for sagging between the jack points. Rebuilders warn the floor pack on some older units is stapled, not framed — weight inside an unsupported camper can break it. A compromised base is a rebuild, not a repair.
Jacks, Tie-Downs, and the Corners That Hold Everything Up
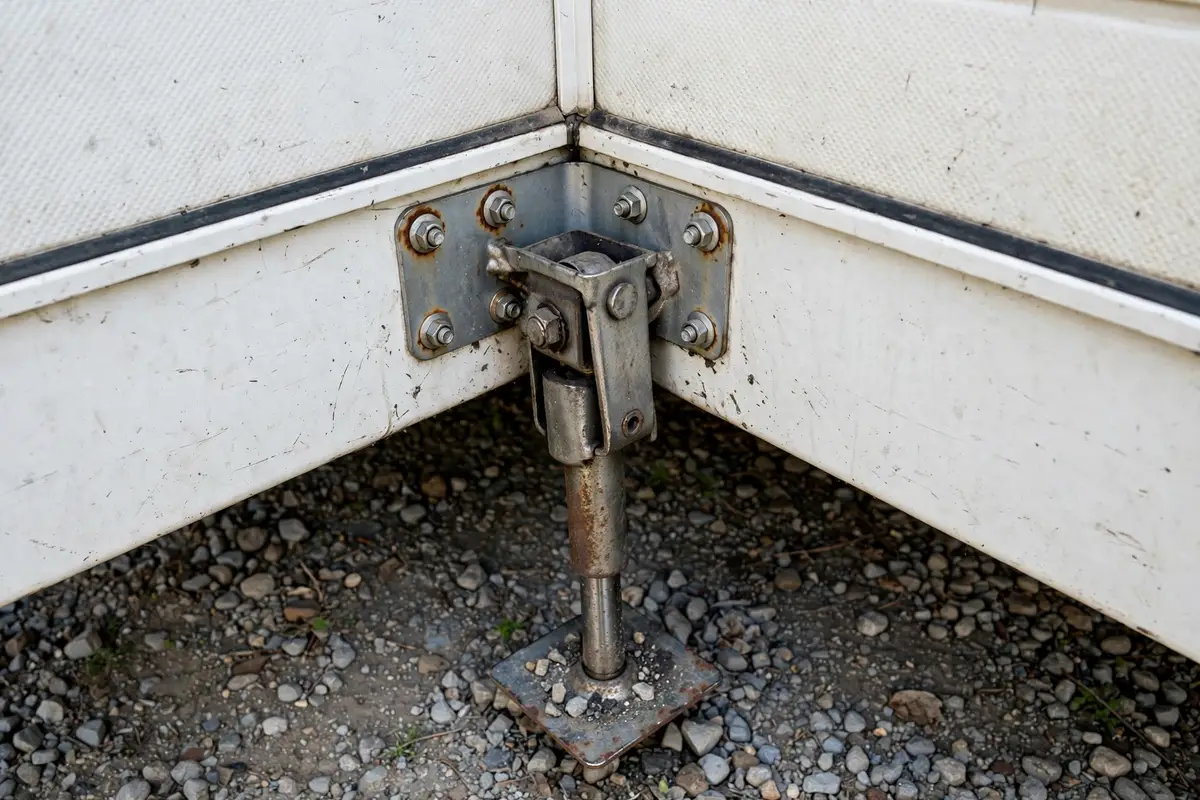
Every generic RV guide skips this section, and it is the one specific to truck campers. The four corner jacks load and unload the camper, hold it in storage, and level it at camp — and per forum accident stories, they are how campers end up on their roofs.
An owner on WanderTheWest’s Rules for loading a camper thread shared his lesson: loading solo, he barely brushed the camper’s side while backing in and watched it start falling backward off the truck — twisting all three jack plates, the camper teetering half on, half off the bed. He saved it with a farm jack and luck, a hairs breadth from dumping it on its roof. His rules, now mine: level ground, a spotter, jacks in perfect condition, every time.
Your jack inspection:
- Crank every jack through its full range. Smooth, no grinding or dead spots. If the seller will not let you operate them under load, walk — a jack that works empty and fails loaded is the classic surprise.
- Study the mounting plates and brackets. Look for twist damage: bent plates, cracked welds, bolts pulling through the wall. A repaired plate is a story you need to hear, and a price adjustment.
- Check legs and feet. Bent legs mean the camper has been dropped or side-loaded. On electric jacks, confirm the motor runs and the manual override crank is present.
- Tie-downs and turnbuckles. Anchor points should be tight with no wallowed mounting holes — a WanderTheWest thread documented turnbuckle failures at highway speed, and owners landed on proper shackles kept snug.
If the camper sits on its jacks, do not climb inside and throw your weight around. Longtime owners are blunt: many campers are not meant to be lived in on corner jacks alone. Inspect from the doorway; get the floor supported before the interior walk-through.
Interior: Ceilings, Floors, and the Smell Test
Step inside and breathe before you touch anything. A clean used camper smells like nothing much; a problem camper smells musty, damp, or sharply of air freshener — the smell of a seller covering something up. The forum advice is unanimous: musty smell, walk away.
The ceiling: press every corner with your thumb
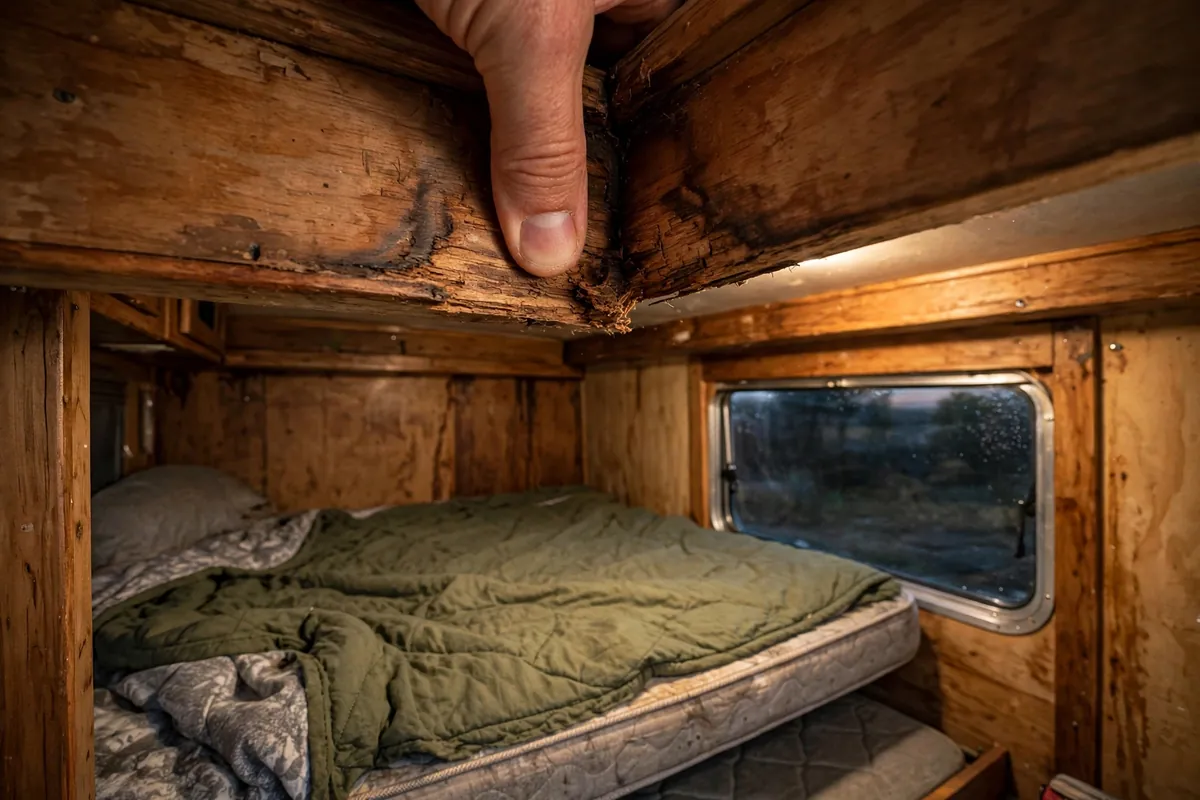
Start at the cabover — it takes the most weather and shows damage first. Press your thumb hard into the ceiling at every corner, around every vent and skylight, and along the cabover-to-roof seam. Solid structure feels hard; water damage feels spongy or crunchy, and your thumb may leave a dent that stays. Check the headliner for stains, rings, bubbling, or fresh paint in one area — a dry stain often means a leak painted over, not repaired. Cosmetics are cheap. Structure is not.
The floor: walk it like you mean it
Walk the whole floor slowly, heel to toe, feeling for soft spots — around the entry door, under windows, around the toilet and shower, under the dinette, anywhere plumbing runs. Soft spots are never normal; forum owners call them a sure sign of water damage. Vinyl flooring is waterproof, so a floor can rot underneath vinyl that looks perfect. If one section looks newer than the rest, ask why — you need proof the leak is fixed, not just floored over.
Cabinets, plumbing runs, and hidden corners
Open every cabinet and flashlight the insides, especially under the sink and where cabinet backs meet exterior walls: swollen shelves, peeling veneer, staining, dampness. If the seller lets you run water, pressurize the lines and watch fittings for drips — a pump that keeps cycling with no tap open means a leak.
Check under and around the water heater too. A forum owner who found water damage after purchase traced it to a failed heater — these units commonly fail after heavy propane use, and his replacement ran about $850 CAD before installation. Wetness there should make you ask what else got wet.
Condensation history versus active leaks
Ask the seller about condensation in cold weather and how they managed it. Chronic condensation stains window frames and mildews curtain edges, mimicking leak damage — but condensation is manageable and a roof leak is not. Read our condensation guide later; during the inspection, treat every stain as a leak until a dry meter reading says otherwise.
Appliances and Systems: Test Everything Under Load

Appliances are the biggest repair bills after structural water damage, and “it worked last season” is worth nothing. Test everything while you stand there, and give each system time.
- Refrigerator. Run it on 120-volt shore power and propane. Absorption fridges need hours to show their true colors — confirm real cold in freezer and box. Replacements are brutally expensive; one owner log put one at around $1,400 before installation.
- Furnace and water heater. Run the furnace through a full heat cycle — prompt lighting, hot air at every vent, no short-cycling, no propane smell. Same for the water heater on gas and electric. Any propane smell around the locker or lines stops the inspection until a qualified tech checks it.
- Water system. Fill the fresh tank partly, run the pump, open every tap including the exterior shower, and watch fittings for drips. Flush the toilet several times and check the base and floor for weeping. If the camper is winterized and the seller will not de-winterize, our winterizing guide explains what you are missing.
- Electrical. On shore power, test every outlet, light, and switch. Check converter output at the battery with a multimeter — a dead converter cooks batteries while masquerading as “just an old battery.” Inspect for corrosion and date codes; batteries past five years are a near-term replacement whatever the seller claims. If there is solar, confirm the controller shows charge current in sunlight.
- Detectors and safety gear. Test the smoke, CO, and propane detectors and check their dates — CO and propane detectors expire after 5 to 7 years. Confirm a charged fire extinguisher is on board. Cheapest life-safety check on the list.
One community trick worth stealing: an owner on the Sunline Owners Club forum brought a pinless moisture meter to an inspection that otherwise looked perfect. The meter pegged at three spots, and a ladder check found a failed window seal and cracked caulking around a skylight. That buyer walked away from a rotten roof because of a cheap tool and twenty minutes. Take readings at ceiling corners, around windows, at floor-wall joints, and in the cabover — always comparing against a known-dry area of the same material, since metal framing can give false highs.
Paperwork: Title, VIN, and the Questions Sellers Hate
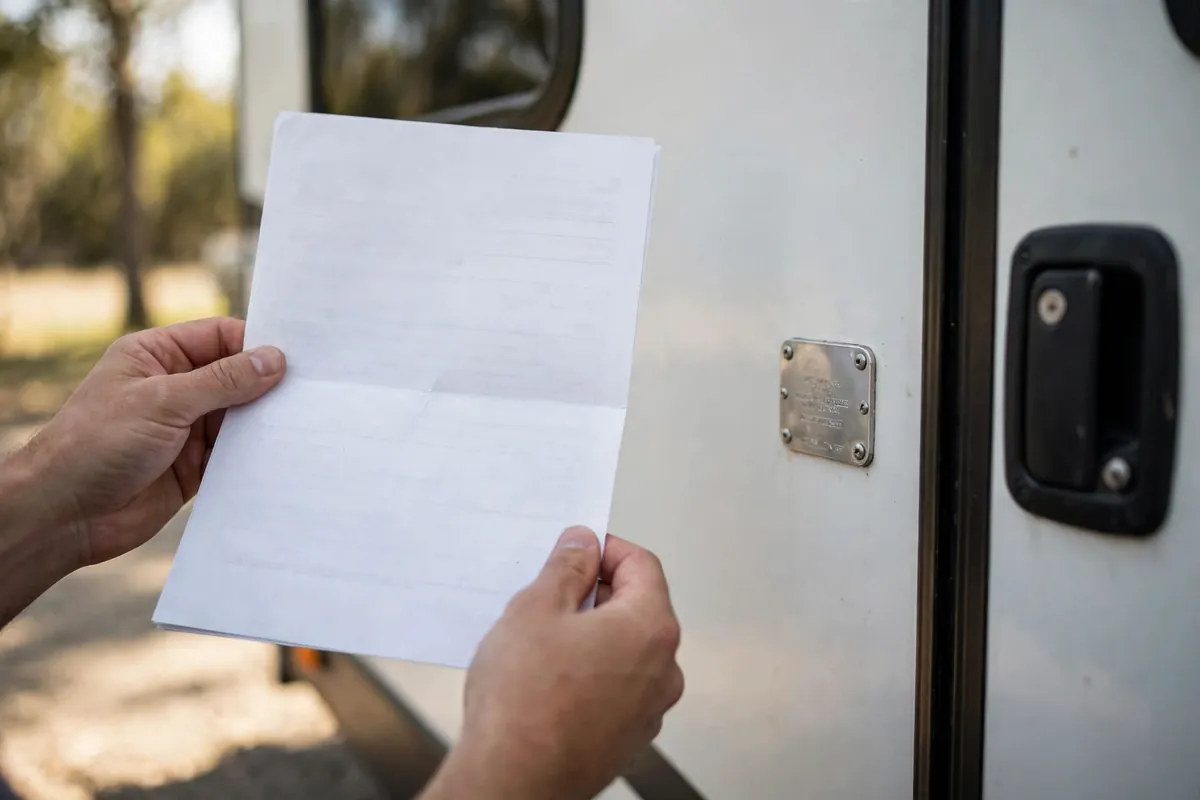
A perfect camper with bad paperwork is a lawsuit with a view. Check the paperwork before you fall in love, not after.
- Match the VIN everywhere. Find the VIN plate on the camper and compare it character by character against the title, then run it through the NHTSA VIN decoder. A VIN that does not decode — or decodes to a different model year than the title — is a walk-away.
- Title status and liens. See the actual title, not a photo. Check for salvage, rebuilt, or flood branding, and confirm the seller’s name matches exactly. A listed lienholder must release the lien in writing before you pay — never take “the bank will send the release” on faith.
- Ask the direct questions. Ever been in a flood? Ever had water intrusion, and what was repaired? Why are you selling? Stored under cover, or in the sun? Forum owners report seals disintegrating on units stored uncovered in strong sun. Vague answers to direct questions are answers. Believe them.
- Insurance before pickup day. Call your insurer with the VIN before you drive it home. Truck campers often insure as an accessory to the truck policy — our truck camper insurance guide covers the options — but never assume coverage transfers automatically. No policy, no drive.
Payload: Does Your Truck Actually Carry This Camper?
The mistake that dwarfs all others in truck camping has nothing to do with the camper’s condition. Truck Camper Adventure’s “Top 10 Truck Camper Mistakes” puts exceeding your truck’s GVWR and payload rating at number one, and the forums are full of buyers who discovered — after signing — that their truck was thousands of pounds short. Suspension upgrades do not change certified ratings; the door-jamb sticker is the law.
Before you inspect, build a realistic loaded figure: dry weight plus water at 8.3 pounds per gallon (a 30-gallon tank alone is about 250 pounds), propane, batteries, gear, food, and passengers. Compare it against your truck’s payload from the driver’s door sticker, not the brochure. Fit the weight well within capacity, not at the top of it — the difference shows up in braking and sway. Run the numbers through a truck camper payload calculator first; if the math fails, no checklist makes the camper right for you. Diesel owners, note: the heavy engine eats shocking payload — the Ram 2500 diesel payload trap is the classic truck that looks capable on paper and is not.
Also check the center-of-gravity marking — it must sit ahead of your truck’s rear axle. Weight behind the axle unloads your steering: dangerous at highway speed.
Red Flags: When to Walk Away
Most findings are negotiation points. These are not:
- Soft ceiling or floor spots you can dent with a thumb — the visible area is the smallest part
- Widespread delamination across multiple panels — the wall sandwich has failed
- A musty or mold smell the seller explains away with air freshener
- A VIN that does not match the title, a missing title, or an unreleased lien
- Jacks that will not operate under load, or mounting plates with unexplained twist or crack damage
- Any propane smell, or a seller who will not let you test appliances
- A seller who refuses a pre-purchase inspection by an independent RV tech
That last one deserves emphasis: at $10,000 to $40,000 a purchase, a professional pre-purchase inspection is the best few hundred dollars you will spend. A seller with nothing to hide says yes.
Frequently Asked Questions About Buying a Used Truck Camper
How much should I budget for repairs on a used truck camper?
I budget for first-year catch-up maintenance on any used camper I buy — sealant, batteries, detectors, small repairs — and price that into what I’m willing to pay. If the inspection finds a bad fridge or soft floor, get a written shop estimate and subtract it from your offer, or walk away.
Is a little delamination okay on an older used camper?
Small, stable, dry delamination confirmed inactive by a moisture meter can be cosmetic — but you cannot confirm that from the outside. Assume hidden damage is two to three times what you see, and treat delamination near the roof, windows, or floor as water intrusion until proven otherwise.
Should I buy from a dealer or a private seller?
Either can work, but the inspection rules do not change. Dealers sometimes offer a short warranty and cleaner title handling; private sellers often know the real maintenance history. Never skip steps because of who is selling — one well-documented forum saga involved a dealer selling a camper far too heavy for the buyer’s truck, and the buyer’s ignorance was no defense.
What is the single most important check on a used truck camper?
The roof and sealant. Everything downstream — ceiling, walls, floor, mold, delamination — starts with water past failed seals. Spend the most time on the ladder and bring the moisture meter. A dry camper with tired appliances is a project; a failed envelope is a money pit wearing a project costume.
Can I use the camper’s age to judge its condition?
Only loosely. A ten-year-old camper stored under cover with resealed seams can be drier than a four-year-old unit that baked uncovered in the sun. Judge the maintenance history and the moisture readings, not the model year.