Truck Camper Awnings: Choosing, Mounting, and Keeping Yours Alive in Wind
A truck camper awning is the cheapest square footage you will ever add to your rig. It turns a patch of hot gravel into a kitchen, a dining room, and a place to sit out a summer shower. It is also the part of the camper most likely to end up flapping over the roof in a storm, torn off its brackets, or quietly rotting because it got rolled up wet one too many times.
I have watched all three happen, and made at least two of those mistakes myself. This guide covers what the types really mean on a truck camper, how to mount one with no factory rail, how much wind is too much, and how to keep it alive for years instead of one bad season.
What a Truck Camper Awning Actually Has to Do
Forget the glossy photos. On a truck camper, an awning has a harder job than on a big motorhome: the wall is shorter, the roof is high, and the rig catches wind like a sail even with the awning rolled up. Weight matters too — a cassette awning plus brackets can easily add 25 to 45 pounds before poles and stakes.
The right question is not which awning is best in general, but which fits your wall, roofline, camping style, and willingness to roll it in at 2 a.m. when wind picks up. A big electric awning you are afraid to deploy is worse than a simple manual one you use every evening.
For most owners, shade is the main job and rain cover is second. If you mostly boondock on dispersed land, where there is no shelter exactly where you parked, the awning earns its keep daily. If you stay in shady developed campgrounds, a smaller setup may serve you better than a full cassette system.
The Main Types, Honestly Compared
Cassette wind-out awnings
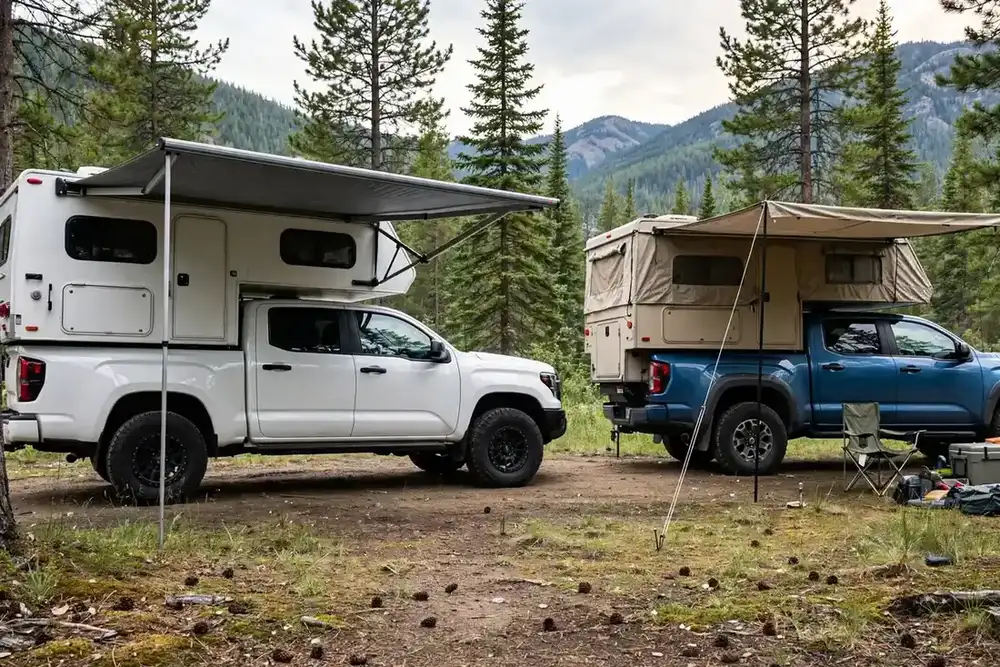
This is the familiar box mounted to the side of the camper: Fiamma F45S-style wind-out units and their competitors. You wind a crank, the fabric unrolls, and telescoping legs drop down. The case protects the fabric in transit, which is a real advantage on dusty back roads. The downside is weight, cost, and the fact that the case itself becomes a wind-catching box if it ever works loose.
Fiamma makes the distinction clearly in its own range: the F45S mounts to a wall or a roof rack, while the roof-mounted F80S sits on top of the vehicle (see the Fiamma 2026 catalogue). That distinction matters more on a truck camper than on a van, because many truck campers have neither a long flat wall nor a usable roof rack. Do not buy first and figure out mounting later.
Power awnings
Power awnings from Dometic and Carefree of Colorado extend at the push of a button, which is genuinely nice after a long drive. Many add a wind or motion sensor that retracts the awning when it starts shaking. Treat that sensor as a backup, not a promise. Dometic’s own Power Awning Pro Kit manual says plainly not to rely on the wind sensor to prevent damage, and to always close the awning when it is unattended or when strong rain or wind is expected. Carefree manuals carry the same warning: the auto-retract system is not a guarantee against severe weather.
Owners on RV forums report the other side of that coin too: sensors that retract the awning on a calm evening for no clear reason, and sensors that fail to retract it in a real gust. If your sensor ever behaves oddly, do not argue with it in a storm. Roll the awning in by hand, check the batteries and connections in daylight, and test it again in calm conditions.
Bag awnings and slide-in rail awnings
A bag awning zips into a bag mounted on the wall, with poles and guy lines doing the structural work. They are lighter and cheaper than cassette units and pack down small, but slower to set up and more dependent on good staking — a poor choice on concrete or hard desert ground unless you carry weights.
A slide-in rail awning works the same way many pop-up camper owners know well: a welted edge slides into an awning rail screwed to the camper, then poles hold the outer edge up. This is often the best retrofit for an older camper, because the rail itself is light and the fabric can be replaced without replacing hardware.
270-degree and freestanding shade
Wraparound 270-degree awnings shade two sides at once, but they work best on flatbed builds and wedge campers with a dedicated rack. On a conventional slide-in camper, a straight side awning plus a separate freestanding canopy for the rear often gives more usable shade for less money and less wall stress.
Mounting a Truck Camper Awning With No Factory Rail
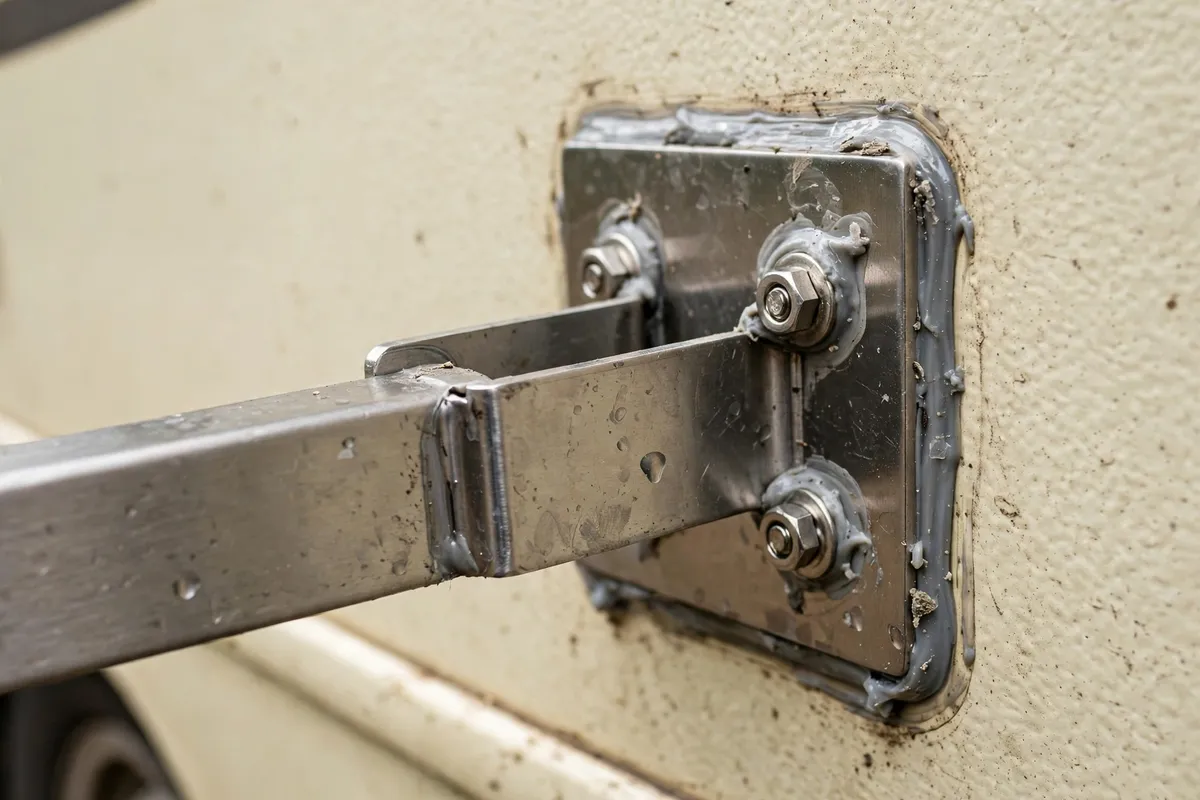
This is where most truck camper owners get stuck, and it is the question I hear most often. Your camper may have no awning rail, no flat wall section long enough for a cassette case, and a curved or ribbed side that will not take brackets cleanly. Here is how to think through it in order.
First, find structure. A truck camper wall is not uniformly strong. The places that will actually hold an awning are the same places that hold other things: around the roof edge framing, near vertical framing members, and through into solid backing. Screwing a heavy cassette case into thin fiberglass skin with short screws is how brackets rip out in the first real wind. Owners on fiberglass camper forums make the same point from experience: the design has to spread the load, because an 8-by-8-foot awning is 64 square feet of sail, and wind trying to lift it generates far more force than the awning weighs.
If you cannot find framing, add backing: an internal reinforcing rail or backing plate, bolted through the wall, so the skin is sandwiched and the load spreads over a long section instead of concentrating on four screws. Yes, that means holes. Done properly with sealant, it is far safer than a bracket that tears out and takes wall with it.
Second, decide between side-wall and roof-rack mounting. Side-wall mounting keeps the awning lower, which gives more usable shade, because a high awning throws its shadow far from the camper in low sun. Roof-rack mounting avoids drilling the wall and works well on pop-ups and wedge campers with a rack, but the higher the awning, the smaller the shade footprint below it — a trade-off owners on Wander The West hit when building custom pop-up awnings.
Third, seal every hole. Every bracket bolt is a potential leak path into a wall you cannot easily dry out. Use exterior sealant rated for RV use, seal under the bracket as well as around screw heads, and fold awning seals into the annual truck camper maintenance schedule. A leak at a bracket behaves just like any other truck camper roof leak once water gets behind the skin: invisible for months, expensive by the time you notice it.
If drilling the wall is a hard no, a freestanding canopy gives shade with zero wall risk, or a clamp-on rack mount lets you test awning life for a season before committing to holes.
How Much Wind Is Too Much
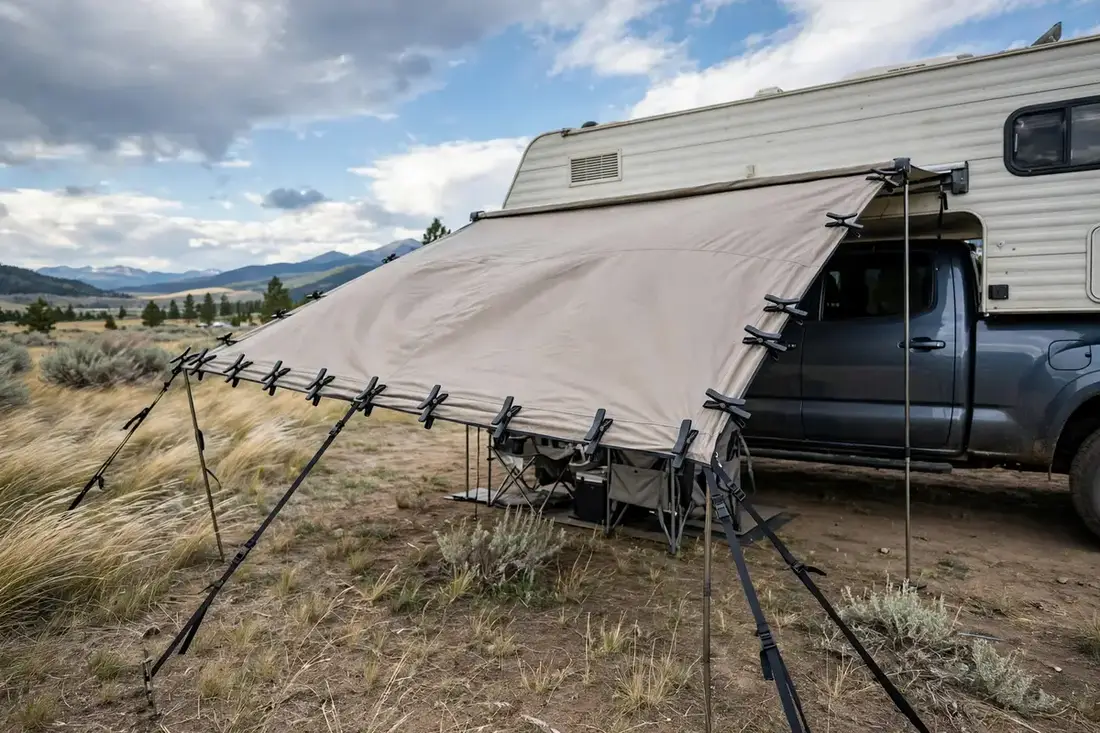
There is no single safe wind number printed on most awnings, because conditions vary: a gusty 15 mph on a big flat awning with loose stakes behaves very differently from the same wind on a small awning staked tight and pitched steeply.
As a practical rule, treat 20 mph sustained wind or gusts approaching 25 to 30 mph as roll-it-in territory, sooner if the awning is large, poorly staked, or already flapping. Forum owners land in the same zone: one put it at 15 mph without hold-down poles and 35 mph with them, while others report damage starting around 30 mph. Those are not manufacturer ratings — they are the lived pattern behind the warnings, and the safe limit is lower than most people hope.
Wind damage happens three ways. Lift peels the awning off the wall and rips brackets out. Flapping fatigues fabric, snaps stitching, and works brackets loose over weeks. Billowing in transit is the worst: an unlatched awning can work itself open on the highway, and owners on iRV2 and Jayco forums describe awnings billowing open in 45 to 50 mph winds, rivets giving way and fabric shredding before the driver could stop. Add a travel strap over the case and check the latch at fuel stops.
Your pre-storm routine should be automatic: check gust forecasts, roll it in if it is flapping hard, roll it in if you leave camp, and ask yourself whether you want to roll it in at 2 a.m. in the rain. Owners on AirForums now roll theirs up at night as a habit for exactly that reason. Tie-downs and de-flapper clamps help in moderate wind, but they do not turn an awning into a storm shelter — use them to extend fair-weather comfort, not to argue with a thunderstorm.
Rain Pooling: The Quiet Awning Killer
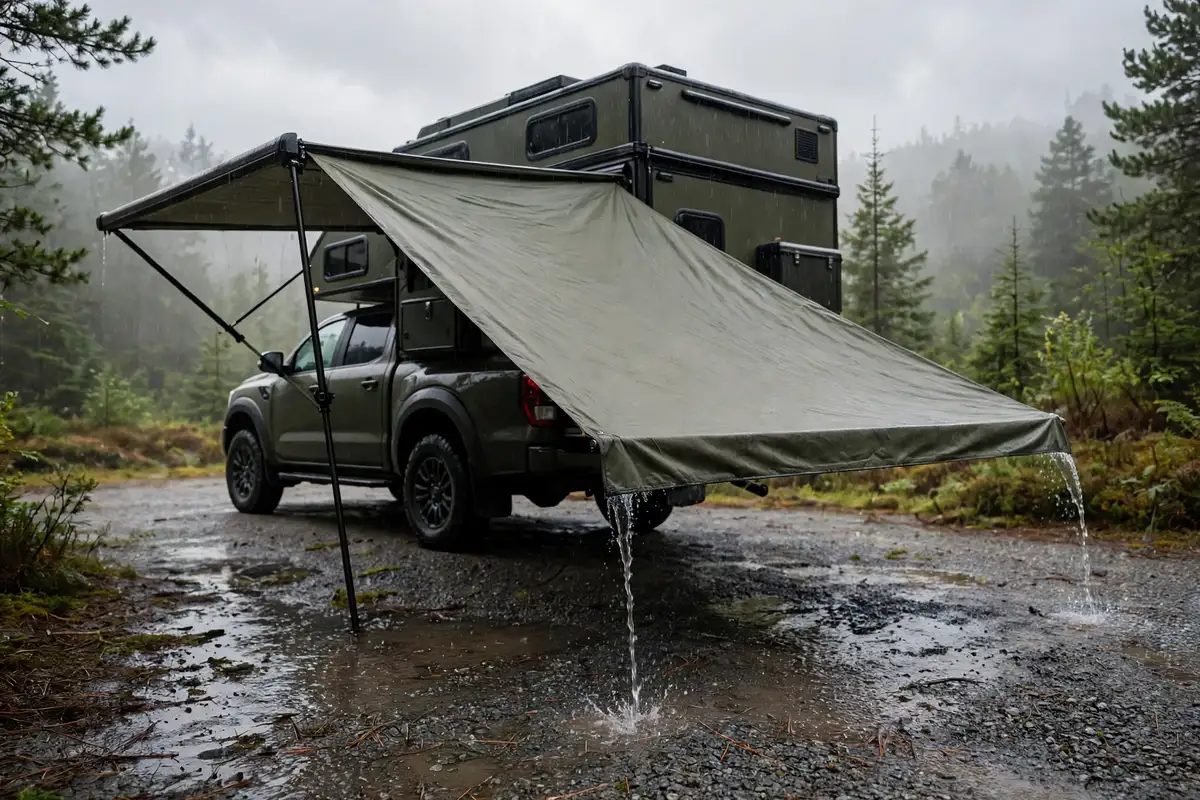
Wind gets the dramatic stories. Rain pooling does the slow, expensive damage: a flat awning collects water in the middle, and a shallow pool can weigh more than you can lift, pulling steadily on fabric, roller tube, arms, and brackets. Owners on Forest River forums report roller tubes buckling under pooled water — one watched a neighbor’s awning buckle, get repaired, and buckle again the same day because nobody changed the pitch.
The fix is simple: pitch one side lower so water runs off instead of pooling. Drop one arm a few inches lower than the other, and do not force an arm past its designed range. A visible slope, roughly 15 to 25 degrees, sheds water without loading the roller tube sideways. Test it with a cup of water: it should run off immediately toward the low side.
Never push up on pooled water from underneath. If hardware is already stressed, the sudden release can collapse the awning onto you. Carefree’s guidance is to retract a pooled awning in short increments, 8 to 12 inches at a time, letting water shed gradually. Retract before heavy or prolonged rain even if pitched well — pitch handles a shower, not an hour-long thunderstorm. And let fabric dry before rolling it up for storage; rolling it up wet is how mildew starts. If you had to roll it up wet to leave a storm, unroll it to dry at your next stop.
Choosing the Right Size for a Truck Camper
Measure your actual usable wall, not the brochure length. A cassette case cannot overhang a door, window frame, or jack bracket and still mount securely. Measure from the first solid mounting point to the last, minus a few inches at each end for bracket clearance and door swing. On most slide-in campers that leaves 8 to 10 feet, sometimes less on short-bed models.
Extension matters as much as length. An 8-foot projection sounds generous until afternoon sun shows the shade falling short of your chairs, because the awning sits high on the wall. If you cook outside, check that the awning covers where you actually stand at the stove in the afternoon, not just at noon.
Weight deserves the same honesty: a cassette awning plus brackets and poles adds high weight where payload is already tight. Run the truck camper payload calculator guide with the awning included, not as an afterthought.
DIY Shade Alternatives That Actually Work
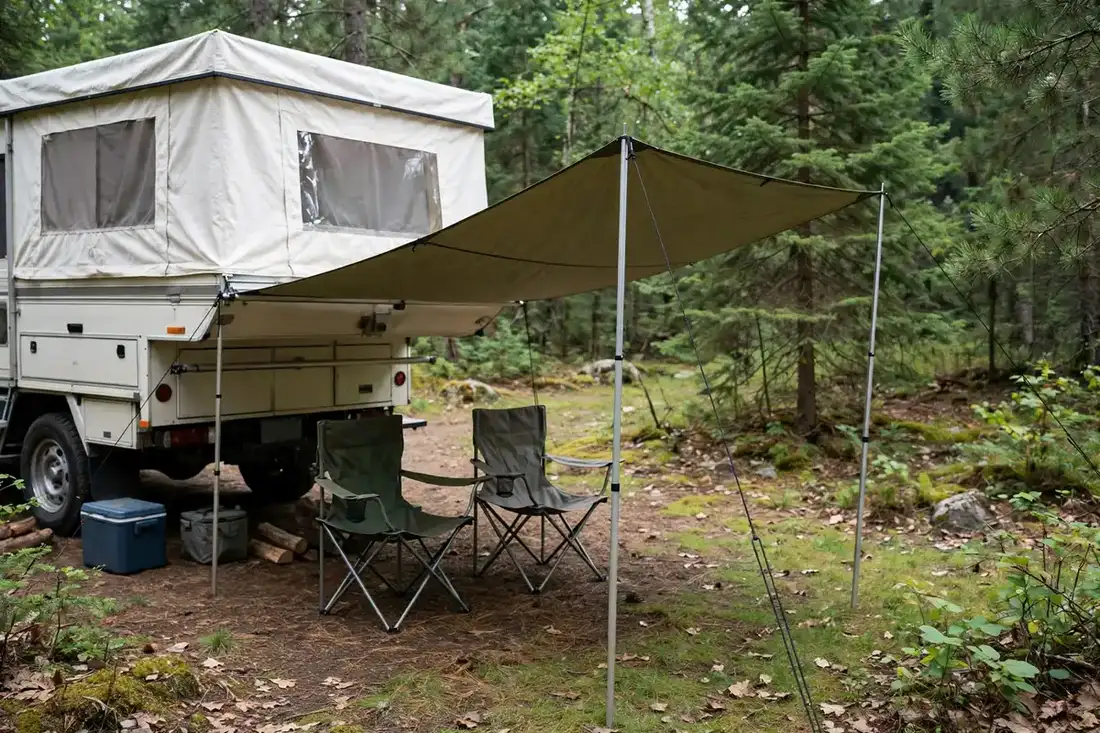
Not everyone needs a permanent awning. Owners on Wander The West have built simple versions for years: a tarp with a welted edge sliding into a lightweight awning rail, two telescoping poles, and guy lines. One solo camper solved setup with a small pipe-flange stand that holds a pole upright while guy lines go on — a detail that matters when you have only two hands.
The DIY rules mirror the bought-awning rules: pitch one side low, stake or weight the poles (an unstaked pole in wind becomes a lever), and keep the tarp taut, because a loose tarp flaps itself to shreds. Accept the limits: a tarp awning is fair-weather shade, not a storm shelter. A freestanding pop-up canopy is the other alternative — bigger shade, movable, no camper contact — but buy the heavier frame, stake all four legs, and take it down when you leave camp.
Care, Cleaning, and Seasonal Storage
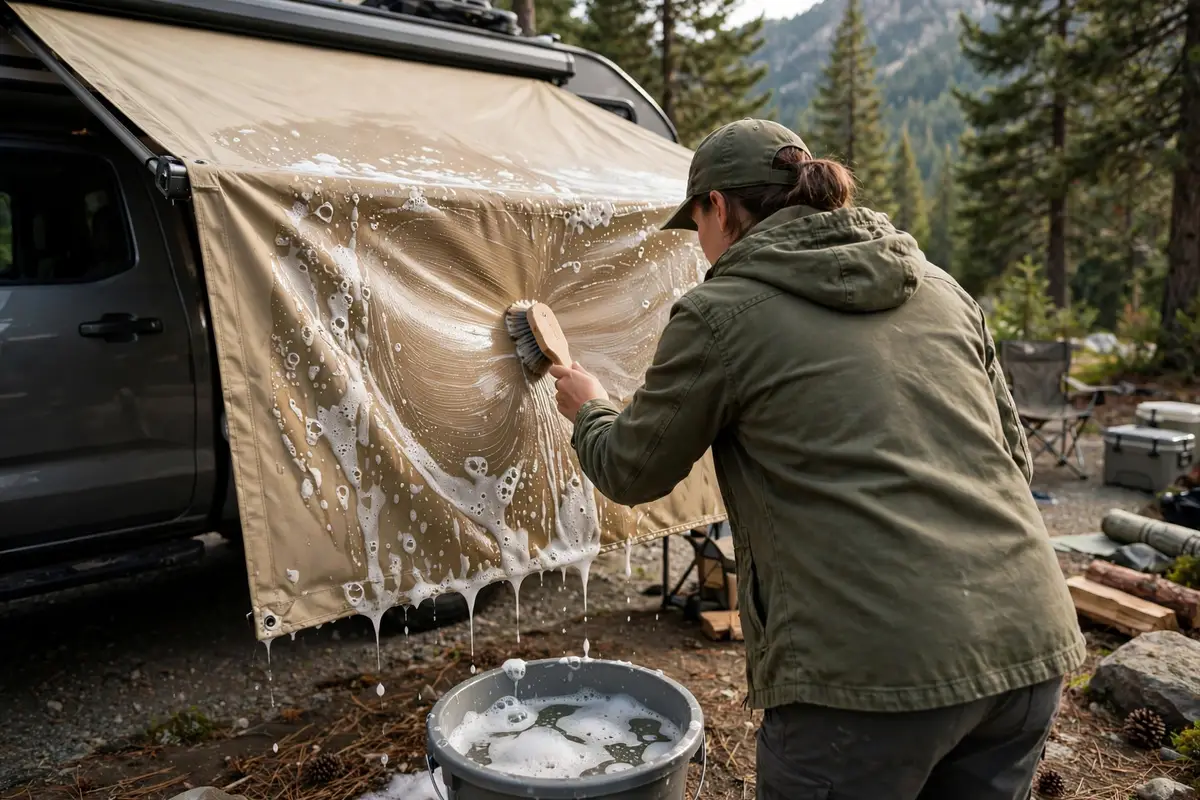
Awnings die from neglect more often than from storms. Twice a year, wash the fabric with mild soap and water — never harsh chemicals or a close-range pressure washer — and let it dry fully before rolling it up. Check stitching along the roller tube and leading edge, where UV and flapping wear it first, lubricate pivots lightly per your manual, and confirm the case latches fully.
Inspect brackets and sealant at the same time for cracked sealant, loose bolts, and water staining below a bracket. Catching a loose bracket early is a ten-minute re-seal; catching it after the wall rots is a body shop job. The same logic applies as to truck camper hail damage repair: small, early attention beats a big repair. For winter, roll it up dry and latched.
What I Would Buy, If I Were Starting Over
Fitting a conventional slide-in today, I would buy a mid-size manual cassette awning, 8 to 10 feet, mounted to a properly backed side wall, with a travel strap over the case and tie-downs and de-flapper clamps in the kit. I would skip power unless I genuinely needed one-button operation — manual is lighter, simpler to fix, and less dependent on a sensor I cannot fully trust — and skip the full room kit until a full season proved I wanted a fabric room instead of open shade.
If my camper were a pop-up or wedge build with a good rack, I would go rack-mounted and accept the higher shade line, because avoiding wall holes on a soft-sided camper is worth a lot. If money were tight, I would start with a tarp-and-rail setup for a season and let real use tell me what size permanent awning I need — cheaper than buying the wrong cassette twice.
Whichever route you take, the rule owners repeat after every disaster holds: if you are not using it, leaving camp, feeling wind pick up, or expecting heavy rain, roll it in. An awning in its case cannot be destroyed by weather. For the rest of your kit, the full truck camping gear guide is a useful cross-check.
Frequently Asked Questions
Can I mount a truck camper awning if my camper has no awning rail?
Yes, but do not screw a heavy awning into bare skin alone. Find or add structural backing, use through-bolts with backing plates or an internal reinforcing rail, seal every hole, and consider a roof-rack mount if your camper already has a rack. A freestanding canopy is the no-holes alternative.
How windy is too windy for a truck camper awning?
Treat sustained wind around 20 mph, or gusts approaching 25 to 30 mph, as roll-it-in territory, sooner for a large awning, poor staking, or visible flapping. Sensors and tie-downs are backups, not guarantees. Never leave an awning out unattended in uncertain weather.
Why does my awning collect water in the middle?
Because it is pitched too flat. Lower one arm so water runs off to one side. Never push pooled water up from underneath — retract in short increments so it sheds gradually, and retract before heavy rain.
Should I choose a power awning or a manual awning for a truck camper?
Manual is usually lighter, cheaper, and easier to repair in the field, which suits most truck campers. Power is more convenient but adds weight, wiring, and dependence on a motor and sensor. If you choose power, keep the manual override instructions in the camper and test the sensor in calm conditions first.
Can I leave my awning out overnight?
Only in settled, calm weather with good pitch and solid staking, and only if you will get up and roll it in if conditions change. Most experienced owners roll it in at night as a habit, because overnight storms cause most awning losses.
How do I stop my awning from opening while driving?
Latch the case fully every time, add a travel strap or lock for highway driving in wind, and check the latch at fuel stops. Awnings that billow open at speed are usually destroyed and can damage the wall as they flail.