Truck Camper Roof Vent Fan Upgrade A Practical Install Guide
A truck camper roof vent fan upgrade was the best comfort change I made to my camper, and it took one Saturday, not a new air conditioner. My old fan over the bed sounded like a tired hair dryer, barely stirred the curtains, and had to shut tight whenever a cloud appeared. The new one runs low and quiet all night, pulls cooking steam out the roof, and keeps working in rain.
This guide covers the job as I did it: picking a fan that fits, wiring it safely on 12 volts, removing the old unit without tearing the roof, sealing the new opening, adding rain protection, and tuning it for quiet airflow. It is not an air-conditioning guide or a full roof repair. It is the fan swap itself.
Why a truck camper roof vent fan upgrade is worth doing
A truck camper is a small box with a bed, a stove, and two people breathing in it all night. Hot air and cooking steam rise to the ceiling, and a passive vent just waits for a breeze. A powered fan pulls stale air out, and a cracked far window pulls fresh air in behind it.
You know yours is due when the fan is loud on its only usable speed, the blades are small, or the lid is yellowed or will not seal. Owners on RV forums report the same pattern: the stock factory bathroom fan is noisy and weak, and a proper 12-inch fan finally makes warm nights livable. One owner on iRV2 replaced an original fan purely for noise, then liked the replacement enough to order a second for the kitchen area.
A good fan will not turn your camper into a refrigerated room. On a still, humid evening it will feel like the shade outside, not like air conditioning. If you want real cooling help, read our truck camper air conditioning guide alongside this one. The fan earns its keep even with the AC off by clearing heat, steam, and stale air fast.
Choosing the right fan: size, model type, and features that matter
Start with the hole you already have
Almost every truck camper and RV roof vent uses a standard 14 by 14 inch opening, roughly 14-1/4 by 14-1/4 inches rough opening, so most fans drop into the same hole without cutting a bigger opening. Measure yours anyway: remove the inside trim, measure both ways, and check roof thickness, since trim pieces vary for thick or thin roofs.
Also measure clearance above the roof. A built-in rain-cover fan sits taller when closed — around 5 inches for a MaxxFan Deluxe in several comparisons — which matters with a rack, solar panel, or low garage door. I measured to the lowest obstruction and my garage header before ordering.
Check what is already wired at the vent. Pop the inside trim and look for capped wires. Some campers have them, some do not, and that changes wiring from a 20-minute reconnect to a wire-fishing afternoon.
MaxxFan vs Fantastic Fan, in plain terms
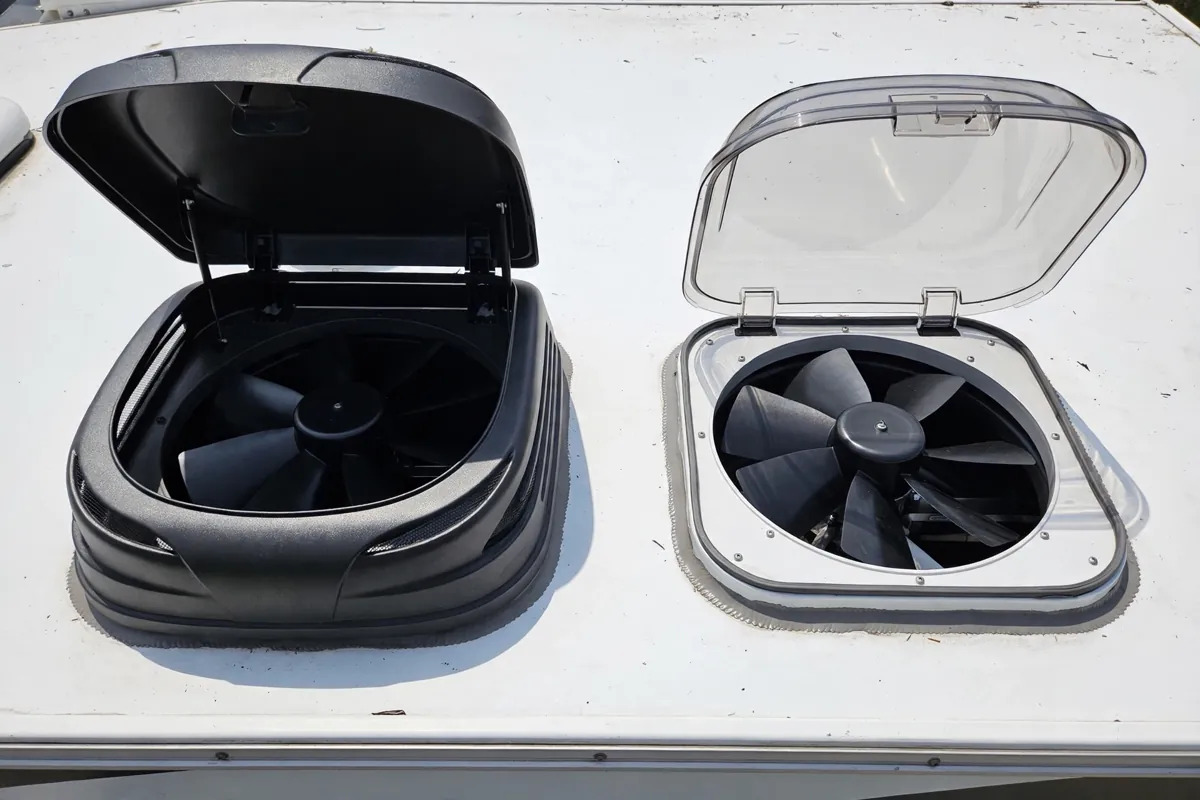
The two names you will see everywhere are MaxxAir MaxxFan and Dometic Fan-Tastic Vent. Both fit the standard opening. The practical difference that decided it for me is rain.
- MaxxFan Deluxe (5100K, 6200K, 7000K, 7500K): 10 speeds, reversible on most Deluxe models, thermostat on many, remote on 7000K/7500K, built-in rain shield. MaxxAir markets it at over 900 CFM on high, about 0.2 amps on low and roughly 3 to 4 amps on high depending on model and source — check your manual. See the official MaxxFan Deluxe sell sheet.
- Fan-Tastic Vent (notably 7350): quiet reputation, reversible, thermostat and remote on higher models, rain sensor on some models that closes the lid in rain. It does not run open in rain without a separate cover. Read Dometic’s Fan-Tastic Vent installation manual before buying.
- Basic 4-speed fans (MaxxFan 4000K class): fewer speeds, no thermostat or remote on the simplest models, lower cost, still a big step up from a stock bathroom fan and sensible for mostly dry-weather camping.
Owners on forums report that rain is often the deciding factor. Owners on Fiberglass RV and Skoolie forums chose the MaxxFan specifically to leave the vent open in rain, while Fantastic Fan owners describe the rain sensor closing the lid — helpful, but then ventilation stops, and owners report the sensor sometimes staying wet and refusing to reopen promptly.
Noise is the second deciding factor, and the number of speeds matters more than the brand. A 10-speed fan can run at speed 2 or 3 all night at a whisper and still move air. A 3-speed fan jumps from too slow to too loud. Owners on forums report the same lesson: a modern multi-speed fan at low speed is barely noticeable.
My pick for most truck campers is a 10-speed reversible fan with a thermostat, covering rain, quiet nights, and cooking steam in one unit. If money is tight, a basic 4-speed reversible fan plus a separate rain cover gets you most of the way there. Skip no-name clones with vague specs; owners on forums consistently warn against cheap off-brand fans.
Tools and materials to have ready before you climb up
Have everything ready first: new fan with trim and screws; butyl tape, 3/4-inch or 1-inch; self-leveling lap sealant such as Dicor; plastic putty knife, scraper, and approved roof cleaner; drill; wire strippers, crimp or lever connectors, heat-shrink and tape; multimeter; rags and a stable ladder.
Work on a warm, dry day if you can. Sealant flows better above about 60 degrees, and you do not want an open 14-inch hole in your roof in a storm.
Removing the old fan without wrecking the roof
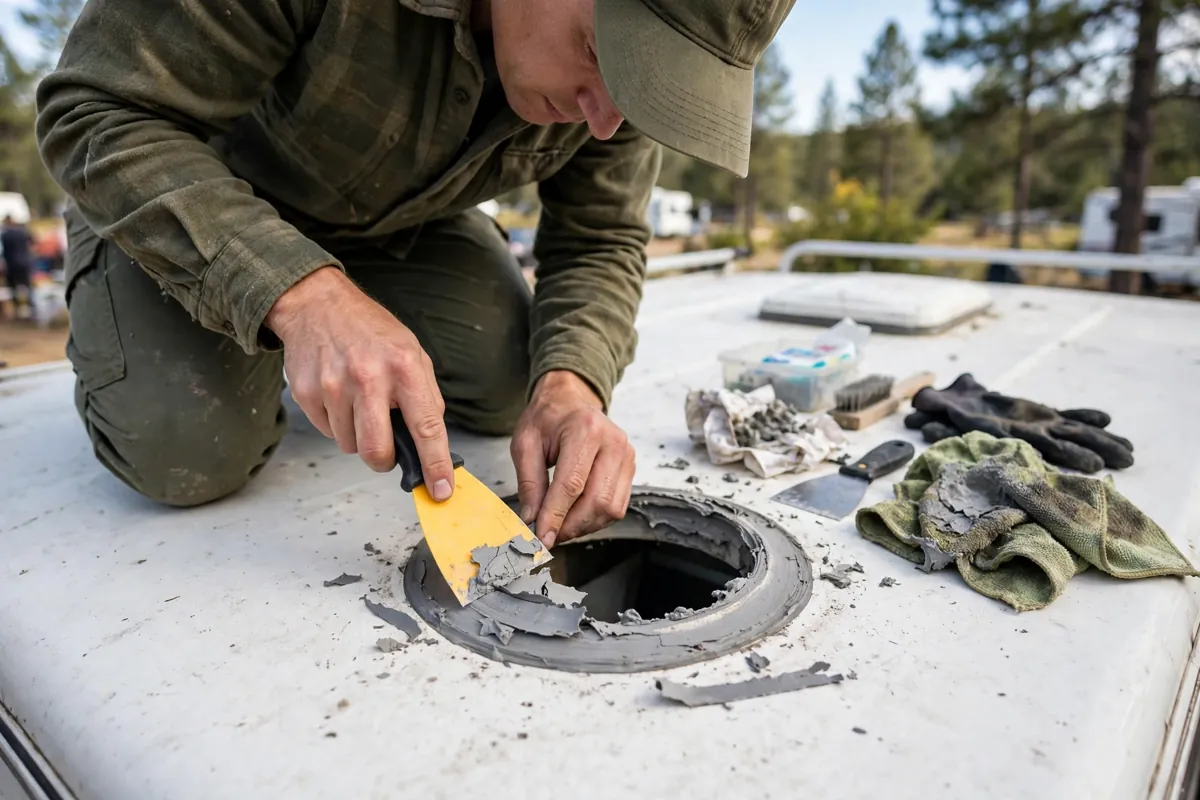
Kill power first: switch off 12 volts at the battery disconnect and pull the fuse for the fan or light circuit. Inside, remove the garnish trim and screen, disconnect the old wires, and photograph them first. Label each wire. Owners on iRV2 warn that mixing up wires turns a simple swap into a troubleshooting afternoon.
On the roof, the slow part begins. The old flange will be buried under old sealant and stuck down with butyl tape. Scrape sealant off the screw heads, remove every screw, then work a plastic putty knife under the flange a little at a time. Do not pry hard with a metal bar. A torn membrane or cracked fiberglass skin turns a fan swap into a roof repair. Our truck camper roof leak repair guide covers real damage, but your goal here is to never need it.
Lift the old unit out and stop. Inspect the opening first: soft decking, blackened wood, a wet ceiling edge, or stripped screw holes mean fix and dry it before fitting the new fan. Sealing over rot just hides it. If the opening is solid, clean off every bit of old butyl and sealant, wipe it down, and let it dry. Sealant sticks to clean, dry surfaces, not dust, old silicone, or damp crumbs.
One more forum lesson: owners on WanderTheWest report cracking a vent dome by driving with it not fully closed, vibration breaking the lift arm. I close my fan fully before driving, every time, and check it on my walk-around.
12V wiring basics: power, polarity, and fuses
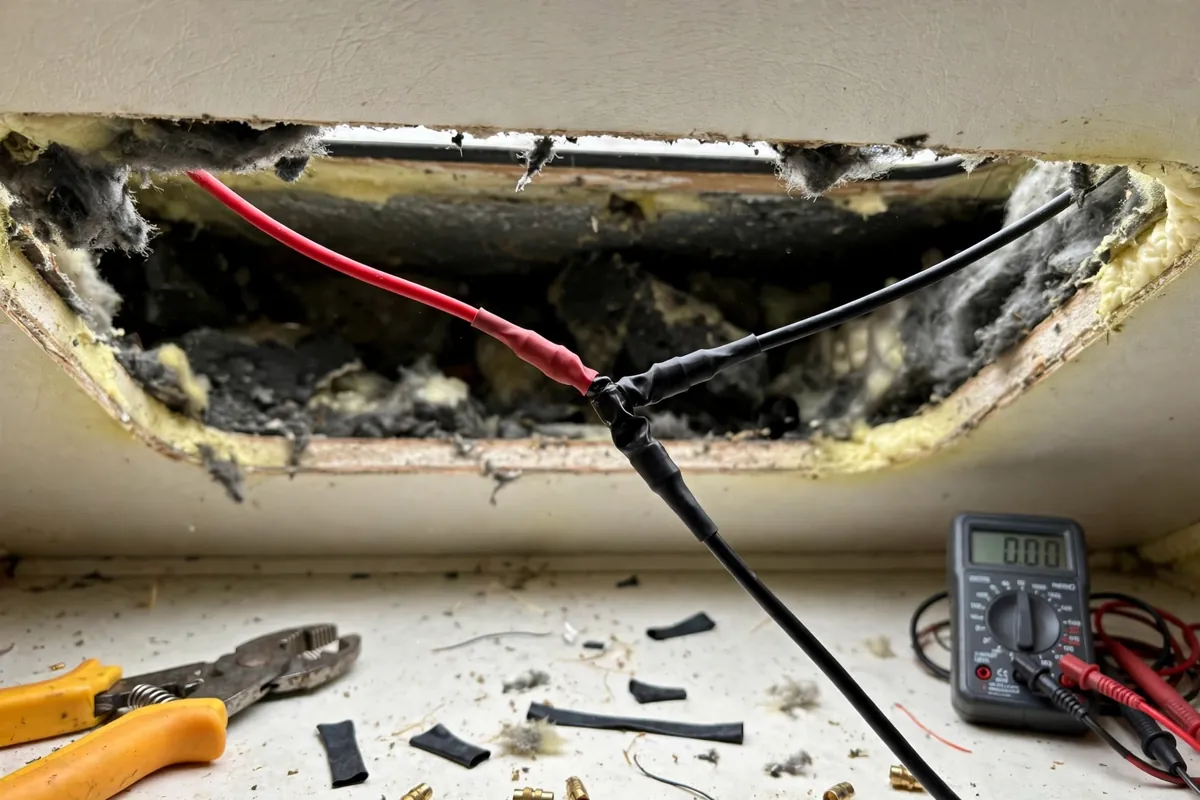
This part scares people, and it should not. A roof vent fan is a simple 12-volt DC load: no shore power, no inverter, running off your house battery or through your converter when plugged in. Your fan manual is the authority, so read it before cutting anything.
Most swaps go one of three ways. First, you already have fan wires at the vent. Test them with the multimeter with the system on; expect roughly 12 volts. Note positive and negative, because RV colours are inconsistent. White is often ground, but owners on Forest River forums report orange, yellow, or black wires doing different jobs in different models. Trust the meter, not the colour.
Second, you have a nearby ceiling light circuit. Owners on iRV2 and Forest River forums report tapping the nearest ceiling light, with two catches. The fan must be wired to a point hot all the time, not downstream of the light switch, or it only runs when the light is on. And the circuit must have headroom: MaxxFan manuals call for a circuit capable of about 5 amps, so check the light circuit fuse rating and what else is already on it.
Third, you have no wire at all. Then fish one, usually from the nearest light or fuse panel through the ceiling cavity, using 14-gauge stranded wire — the gauge owners and installers commonly recommend for this load. Do not run wire across a slide mechanism, pinch it under trim, or bury splices you cannot reach. Every splice gets a proper crimp or lever connector, heat-shrink, and a tug test.
Connect positive to positive and negative to negative, secure wires from chafing on sharp edges, and test before sealing or refitting trim. Run every speed, test intake and exhaust if reversible, and test thermostat and remote from the bed. A reversed wire found now takes two minutes; after sealant cures, it takes an hour.
On fuses, use your manual’s specified size, and never fit a bigger fuse because the old one blew. A blown fuse signals a short, pinched wire, or overloaded circuit, and a bigger fuse just lets that get hotter. If you find melted wiring, stop and get a mobile RV tech.
Setting and sealing the new fan so it never leaks
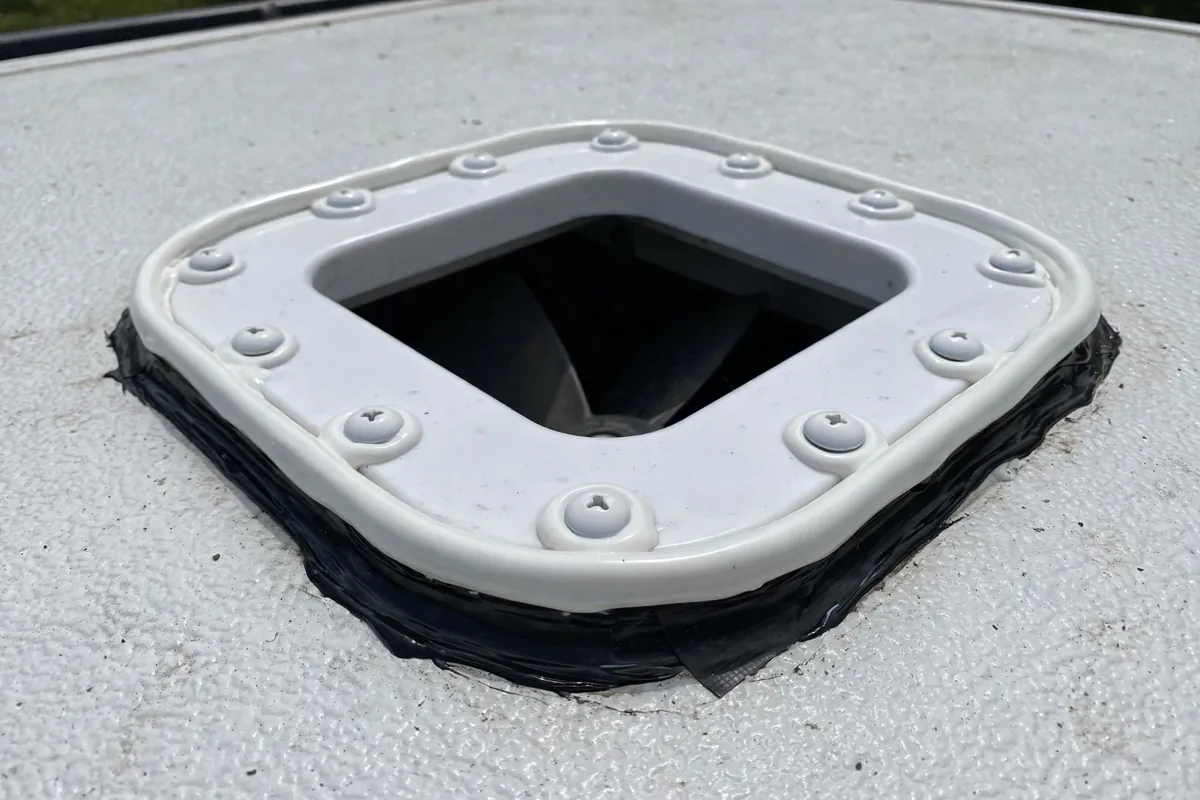
Owners on forums are unanimous: butyl tape under the flange is the real seal; lap sealant on top protects tape and screw heads. Skipping butyl and trusting sealant alone leaks a year later.
Dry-fit the new fan first, hinge toward the front as instructed, and confirm it sits square and the lid opens fully. Lift it out, run butyl tape around the flange underside in one continuous loop, overlapping the ends slightly. Set it back in, press down evenly, then drive screws gradually in a star pattern until butyl squeezes out in a thin, even line. Stop when snug. Owners on iRV2 report cracked flanges from over-tightening, and rusted screws on an old fan fitted without butyl.
Trim the squeezed-out butyl, then cover the flange edge and every screw head with self-leveling lap sealant on the horizontal roof. Self-leveling means roof only — it slumps off vertical surfaces. Apply generously. Dicor’s own roof-vent guidance, in this Dicor lap sealant application video, follows the same pattern: butyl underneath, lap sealant over flange and screw heads.
Do not use silicone on the roof flange. Owners and installers repeat this because nothing sticks to cured silicone later, including the proper fix. If a previous owner siliconed your vent, clean every trace off first.
After sealant skins over, do a gentle hose test around the flange — never a pressure jet at the seam — and check inside for drips. Then log the seal check in your routine. Our truck camper maintenance schedule is where I log mine: a look every few months catches cracking before it becomes a ceiling stain.
Adding a rain cover: built-in shield vs an add-on cover
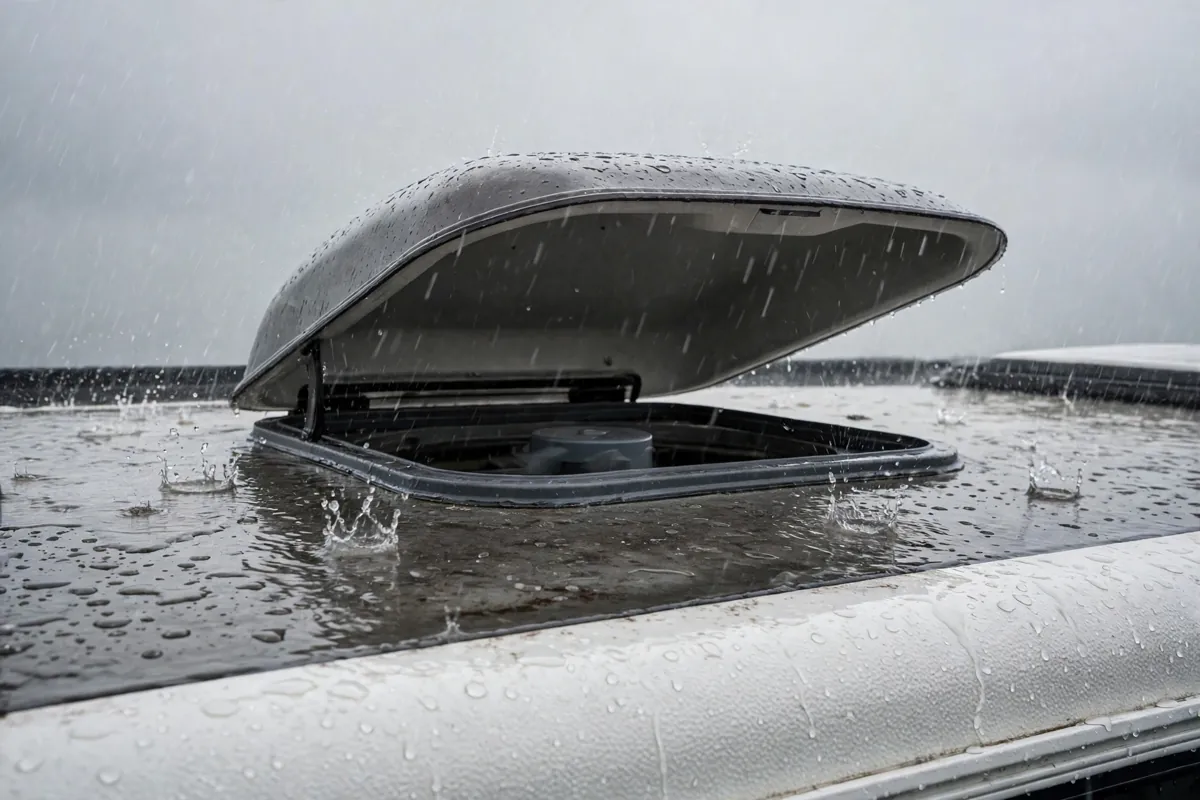
If you bought a Deluxe-style fan, rain protection is built in. Keep the shield clean, check hinges and arms move freely, and do not force a jammed lid.
If your fan has no built-in shield, an add-on cover is next best. Covers such as the MaxxAir FanMate for powered fans and MaxxAir II for standard vents bolt over the vent and let the lid stay open in rain. They also shade the lid from UV, which makes old lids chalky and brittle. Trade-offs: added height, so recheck clearance, and some owners report slightly more wind noise with a cover fitted.
Reducing noise and improving airflow: how to actually use the fan

Run low, not loud. Most nights, speed 2 or 3 on a 10-speed fan moves plenty of air and fades into background noise. Full speed is for clearing smoke or purging a sun-baked camper, not sleeping.
Give it an intake. A fan exhausting with every window shut works weakly and noisily. Crack the window or door farthest from the fan — Dometic’s manual gives the same advice — for a real cross-breeze across the bed and out the roof.
Clear heat before bed, then settle. Open the far window, run high for ten minutes to purge trapped heat, then drop to low and let the thermostat manage the night. Low sips a fraction of an amp; high can draw several amps.
Briefly, on moisture: a fan helps move damp air out after cooking and sleeping, but it is not a complete moisture strategy alone. If damp mornings are your main problem, read our guide to stopping condensation in a truck camper. Ventilation, heating, and bedding work together.
Mistakes to avoid, and when to call a professional
Avoid these eight and you avoid nearly every fan-swap story ending in a leak or a second ladder trip: ordering before measuring; tapping a switched light circuit; trusting wire colours over a multimeter; sealing over old butyl, dust, or silicone; over-tightening screws; using self-leveling sealant vertically or silicone on the roof flange; testing only after sealing; and driving off with the lid half-open.
Do it yourself if the opening is solid, wiring is straightforward, and you are comfortable on a roof. Call a mobile RV tech for soft or rotted decking, melted or mystery wiring, an unsafe roof, or a curved roof where the flange will not sit flat.
Frequently asked questions
What size roof vent fan fits a truck camper?
Most truck campers use the standard 14 by 14 inch opening, and most MaxxFan and Fan-Tastic Vent models are made for it. Measure rough opening, roof thickness, and overhead clearance before ordering.
Do I need a rain cover for a truck camper roof vent fan?
You need rain protection in some form for wet-weather ventilation. A MaxxFan Deluxe has a built-in shield; a Fan-Tastic Vent needs a separate cover to stay open in rain. Without either, the lid must close and ventilation stops.
Can I wire a new roof vent fan to my ceiling light circuit?
Often yes, if the tap point is hot all the time and the circuit has headroom for the fan’s roughly 5-amp requirement plus everything else on it. Do not tap downstream of the light switch.
How do I seal a truck camper roof vent fan so it does not leak?
Bed the flange on continuous butyl tape, tighten screws gradually until tape squeezes out slightly, trim excess, then cover flange edge and screw heads with self-leveling lap sealant on the horizontal roof. Never use silicone on the flange, and clean to bare and dry first.
Why is my new roof vent fan still noisy?
Check speed first — most truck campers need only low overnight. Then check loose garnish trim, an unseated screen, or a lid not fully open, all of which can buzz or whistle. Clean a clogged screen before blaming the motor.
Can I run a roof vent fan all night on battery power?
Yes, on low speed, where a modern fan draws only a fraction of an amp. High speed draws several amps and will eat into a small house battery overnight, so purge on high in the evening, then drop to low.