DC-DC Charger Install for a Truck Camper
I spent two seasons driving around with a lithium battery that never got above 80 percent. My solar panels worked fine when parked, but every drive day ended the same way: pull into camp, check the monitor, see 13.2 volts. The truck had been running for six hours and almost nothing had gone into the camper battery. This DC-DC charger install truck camper guide covers the fix.
Safety note: these cables carry 40 to 60 amps, so if any part of this feels outside your comfort zone, pay a qualified auto electrician.
Why Your Alternator Alone Cannot Charge a Camper Battery
The old setup was simple: a wire from the truck battery, through the 7-pin trailer plug, to the camper battery, with a relay in between. It worked when trucks had fixed-voltage alternators and campers had lead-acid batteries. It does not work well anymore.
Most trucks built in the last decade have smart alternators. Instead of holding a steady 14.4 volts, the engine computer varies the output to save fuel, and once the starter battery is happy the alternator may drop to 12.5 volts or lower. A lithium battery sitting at 13.2 volts will not charge at all from a 12.5-volt source.
Then there is the wire. The 7-pin charge line is typically 10 or 12 AWG, and on a crew cab the run can be 25 feet or more. Owners on the Wander The West forum worked through the math on a Four Wheel Camper install and found nearly 17 percent voltage drop over a 25-foot run of 10 AWG wire at charging current.
A DC-DC charger fixes both problems. It takes the alternator’s messy, varying voltage and converts it into a clean multi-stage charge, bulk, absorption, and float, at the exact voltage your battery chemistry needs.

Isolator vs DC-DC Charger
A battery isolator or automatic charge relay (ACR) is just a switch. When the engine runs, it connects the two batteries and lets the alternator voltage flow straight through. That was good enough for lead-acid batteries behind a fixed-voltage alternator. It is not good enough now.
An isolator passes the alternator voltage through unchanged, so if the alternator sits at 12.8 volts, your camper battery gets 12.8 volts and never finishes charging. Worse, lithium batteries have very low internal resistance, so a direct connection can let a big lithium bank pull a huge surge from the alternator. Owners on the Wander The West forum who swapped to lithium while keeping their factory Blue Sea ACR found exactly this: the relay connects the batteries directly, the lithium bank tries to drink everything the alternator can give, and nothing limits the flow.
A DC-DC charger is one-way by design, so the camper battery can never drain your starter battery.
For every lithium setup, the DC-DC charger is the right tool. If you are still deciding between battery types, my solar and lithium sizing guide walks through how big a bank you actually need before you buy anything.
DC-DC Charger Install Truck Camper: What Size Do You Need?
Chargers commonly come in 20A, 25A, 30A, 40A, 50A, and 60A sizes. Bigger is not automatically better, because every amp of output has to come through your wiring and your alternator.
- 20A: right for a single 100Ah battery or a weekend camper. A 100Ah lithium bank charges from empty in roughly five hours of driving.
- 25A to 30A: the sweet spot for most truck campers. A 100Ah bank charges in about three hours. This is the size I run.
- 40A: a good pick for a 200 to 300Ah bank, or if you drive short legs between camps and need every hour of driving to count.
- 50A to 60A: for 300Ah-plus banks.
Size the charger at roughly 20 to 40 percent of your battery bank capacity, and check your battery’s maximum charge current.
Then check the other end of the chain: your alternator. A DC-DC charger draws more current on the input side than it delivers on the output side. A 30A Victron Orion draws about 35 amps in. A 40A Renogy can draw up to 45 amps in, and the Renogy manual warns that input current can run up to 50 percent higher than the rated output. Keep the input draw under about a third of your alternator’s rating; when in doubt, size down.
The Three Chargers Owners Actually Buy
Victron Orion-Tr Smart 12/12-30. The 30A, 360-watt model is the default recommendation in the truck camper world. It delivers 30 amps continuously at 40 degrees C and runs an adaptive three-stage charge (bulk, absorption, float) with eight preprogrammed battery settings, including lithium, configured over Bluetooth in the VictronConnect app. Victron recommends a 60A fuse on the input side. Read the cable and fuse tables in the Orion-Tr Smart installation manual before any install.
Renogy 40A DC-DC with MPPT (RBC40D1S). The value pick, and the one I see most often in Four Wheel Camper builds. It delivers 40 amps and 616 watts, accepts both alternator and solar input with MPPT, and supports LiFePO4 with a 14.4-volt constant-voltage stage. Renogy specifies a 60A fuse on the input and a 50A fuse on the output, and recommends 6 AWG cable on the input side. Note that the Renogy does not auto-detect battery chemistry: you have to set it to lithium yourself, and owners have caught themselves running for months on the wrong profile. Full specs are in the Renogy 40A DC-DC manual.
REDARC BCDC1225D. The 25A dual-input charger, popular in the overlanding world. It delivers 25 amps and 375 watts, takes a wide 9 to 32 volt input, has a built-in MPPT solar regulator, and offers four charging profiles including a lithium profile that peaks at 14.5 volts. REDARC specifies a 40A input fuse. Details are in the BCDC installation and user guide.
Pick based on battery size, alternator, and whether you want solar input built in.
Smart Alternators: The Problem That Catches Everyone
Here is the failure owners report most often. A 3rd-generation Tacoma owner on the iRV2 forum described it exactly: his truck has a variable-voltage alternator, and his DC-DC charger kept dropping out, cycling on and off, and never getting the battery to full charge. The problem was not the charger. The charger decides the engine is running by watching the input voltage, and a smart alternator does not hold a steady voltage. When the alternator drops to 12.5 volts to save fuel, the charger concludes the engine has stopped and shuts itself off, then wakes up when the voltage recovers, and the cycle repeats all day.
The fix is an ignition trigger, sometimes called a D+ or engine-running signal: a wire that is live only when the engine is actually running. On the Renogy, that is the IGN wire, and Renogy says to connect it on smart-alternator vehicles. On the Victron Orion, you wire an engine-running signal to the L-pin of the remote connector, which overrides the voltage-based engine shutdown detection.
Test before you buy: run the truck for ten minutes and measure voltage at the starter battery. Around 14.4 volts means a traditional alternator. Around 12.5 to 13.5 volts means a smart alternator, and you should plan on using the ignition trigger from day one.
Wiring and Fusing: The Part That Actually Matters

The wire run from the truck battery to the camper is where installs succeed or fail.
Do not use the 7-pin charge line. This is the single most common mistake in the forums. The factory charge wire is 10 or 12 AWG, fused at 15 to 30 amps depending on the truck, and it was designed to trickle-charge a small lead-acid battery, not to feed a 30 or 40 amp charger. Owners on the Airforums who measured what actually comes through the 7-pin report getting only 2 to 4 amps into their lithium bank. Run a dedicated heavy cable.
Size the cable for the run. The run from the starter battery to the camper battery on a crew cab truck is often 20 to 25 feet each way, and voltage drop is what kills you. As a starting point, use 6 AWG for a 30A charger and 4 AWG for a 40A or 60A charger on a full-length truck bed run, then go one size heavier if your run is unusually long.
Fuse both ends, close to the batteries. A fuse protects the wire, not the charger. Put a fuse or circuit breaker within 18 inches of the starter battery on the input cable, and another within 18 inches of the camper battery on the output cable. Use the fuse size your charger manual specifies: 60A input for the Victron Orion-Tr Smart 30A and the Renogy 40A, 40A input for the REDARC BCDC1225D.
Run a proper negative cable too. Do not rely on the truck frame or the camper chassis as your only return path for 30 to 40 amps. Run a dedicated negative cable of the same gauge as the positive.
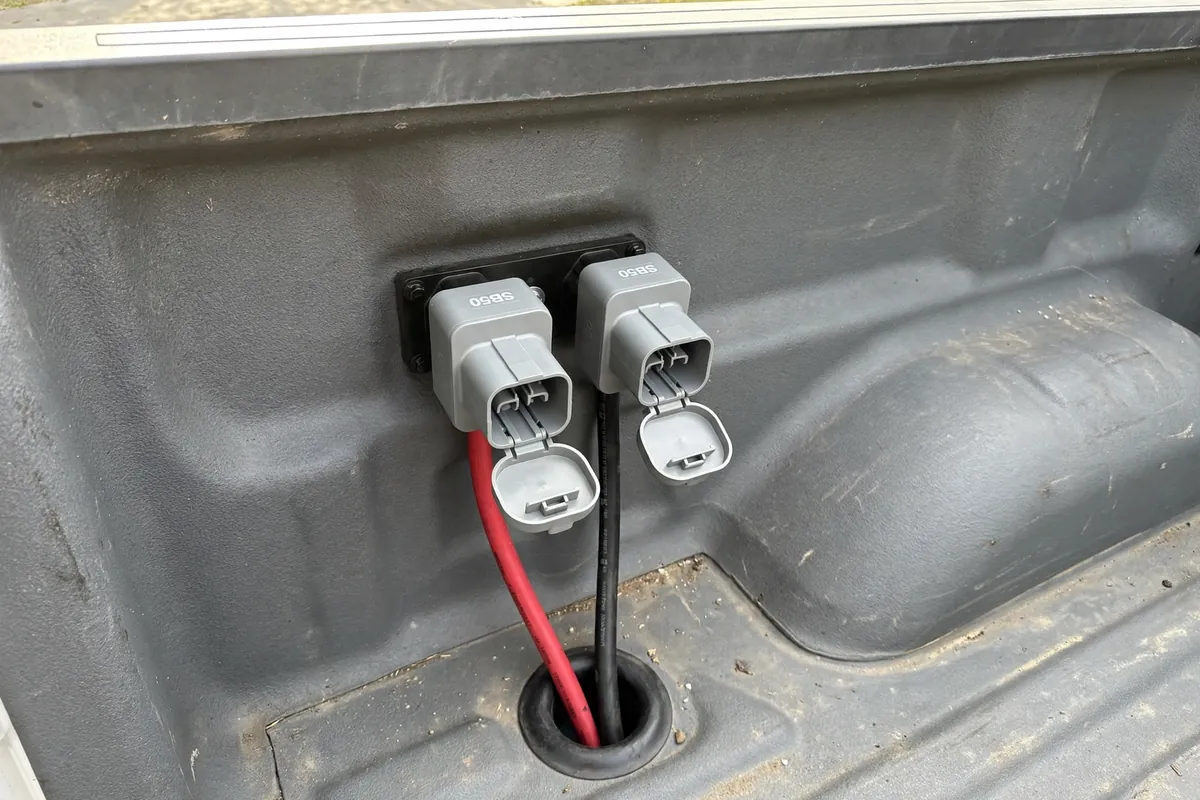
Use Anderson connectors at the bed. The camper comes off the truck, so the power feed needs a clean break point. Anderson SB50 connectors for a 30A setup and SB120 connectors for a 40A or 60A setup are the standard choice. They are polarized, so you cannot plug them in backwards.
Lithium Charging Profiles: Set It Before You Connect
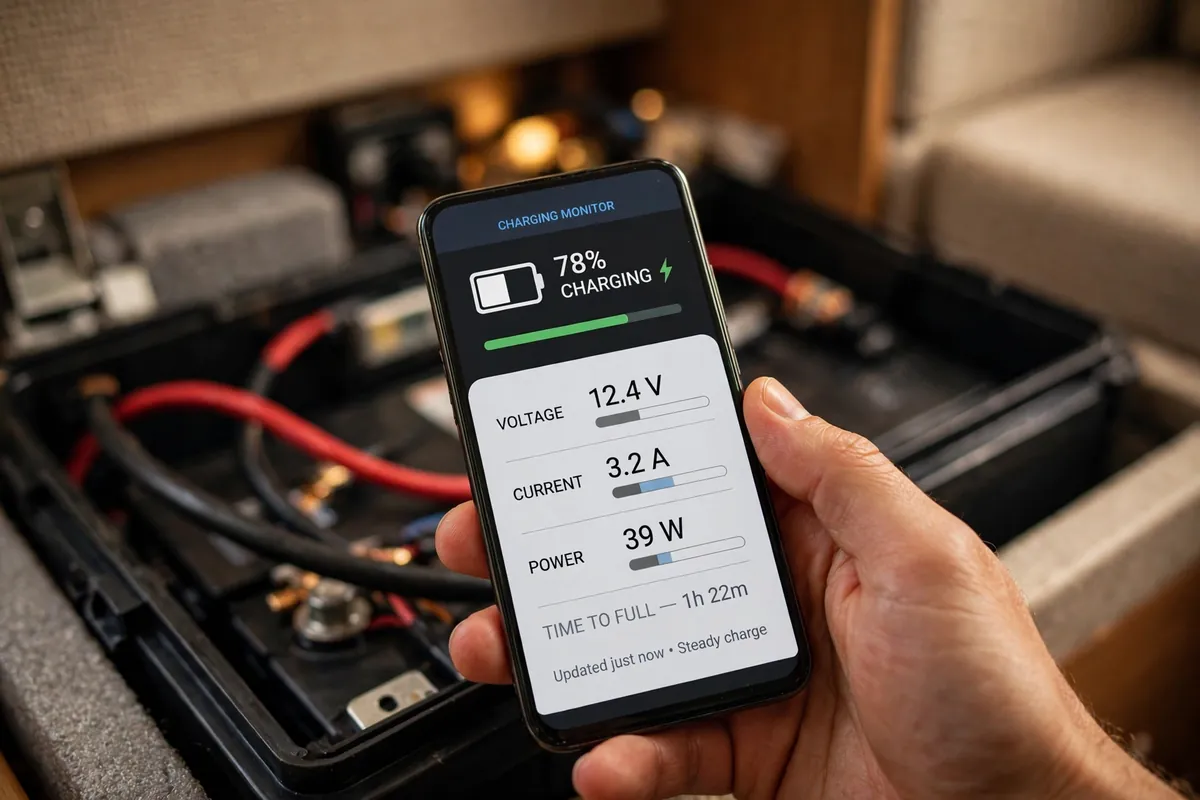
A DC-DC charger runs a multi-stage profile: bulk, where it pushes full current; absorption, where it holds a set voltage while the current tapers; and float, where it holds a lower maintenance voltage. For LiFePO4, absorption is typically 14.4 to 14.6 volts, and there is no float stage at all.
The critical point is that the charger does not know what battery you have. You have to tell it. On the Victron, open the VictronConnect app and select the lithium preset before you connect the battery. On the Renogy, press the battery-type button until the LED shows blue for LiFePO4. On the REDARC, set the profile selector to Li. If you leave a Renogy on its default gel profile, it will charge your lithium bank to 14.2 volts and float it at 13.6 volts, which is wrong for lithium. Owners have reported exactly this: months of driving with a charger set to AGM, wondering why the battery never showed full.
Set the charger to match your battery’s spec sheet.
Do not charge lithium below freezing: most LiFePO4 batteries prohibit charging below 0 degrees C.
The Install, Step by Step
Budget a full afternoon; work with the camper off the truck if you can.
1. Plan the layout. Mount the charger in the camper, as close to the camper battery as practical. The long cable run should be on the input side, where the charger can compensate for voltage drop.
2. Disconnect everything. Disconnect the camper battery negative terminal first, then the positive.
3. Run the input cable. Route the positive cable from the starter battery, along the frame rail, to the truck bed. Protect it with split loom where it passes sharp edges, clamp it so it cannot chafe, and keep it away from the exhaust. Fit the fuse holder within 18 inches of the starter battery, fuse out for now, and terminate the bed end in an Anderson connector.
4. Run the camper-side cable. From the bed connector, run cable into the camper to the charger input terminals. Fit the output cable from the charger to the camper battery, with a fuse or breaker within 18 inches of the battery.
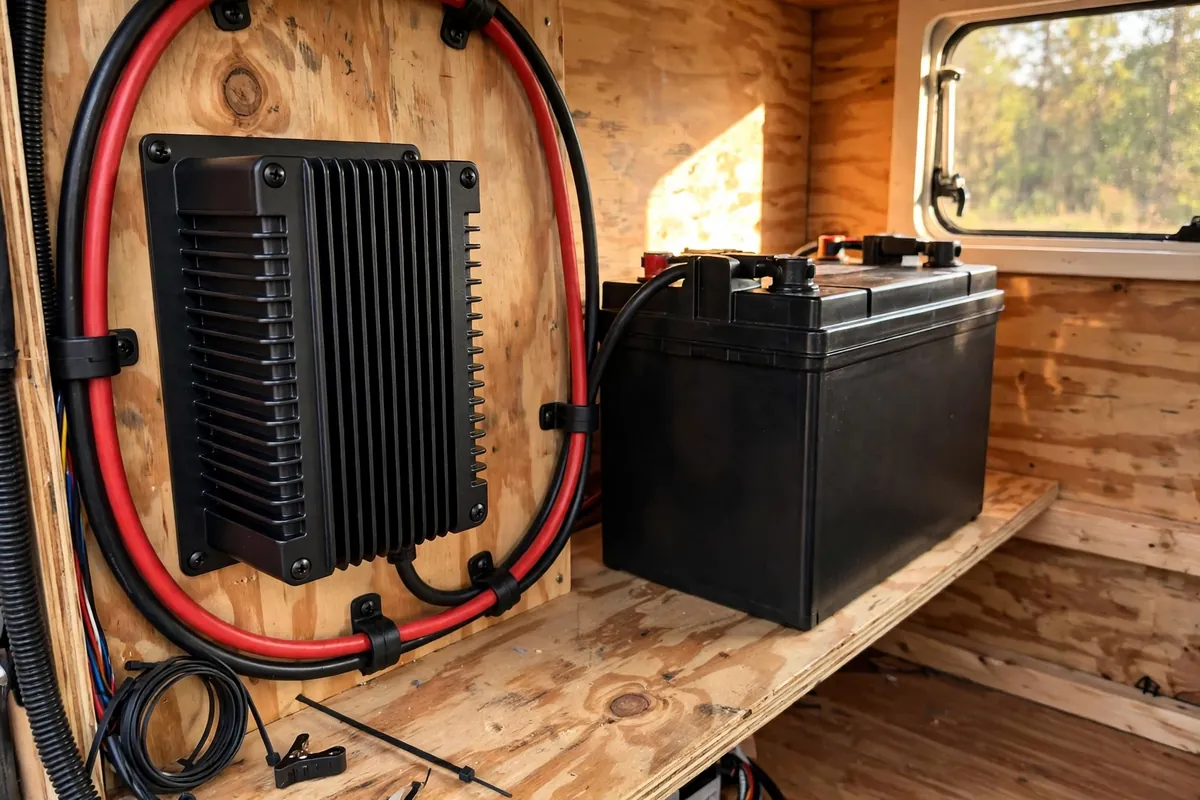
5. Mount the charger. Screw it to a solid, non-flammable surface, vertically, terminals down, with clearance above and below for cooling. Do not mount it directly above the battery.
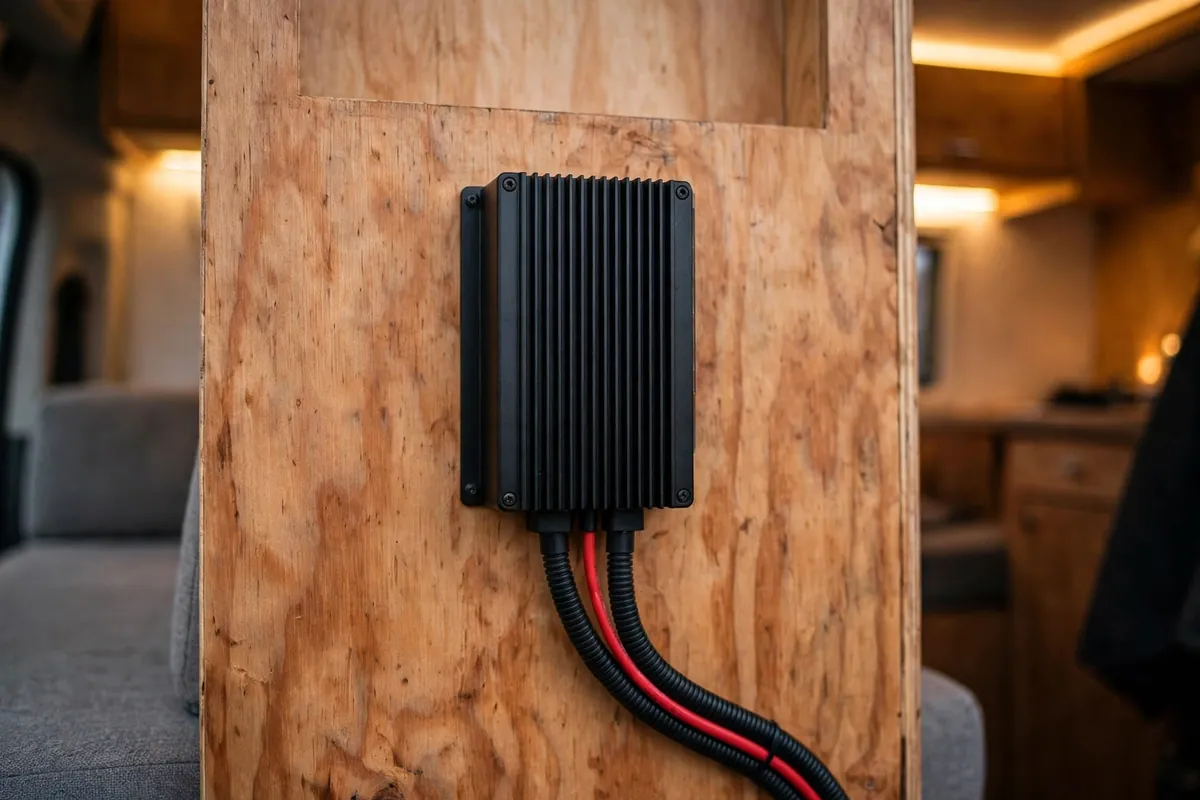
6. Make the connections. Connect the charger to the camper battery first, checking polarity twice. Victron is blunt about this: the Orion-Tr Smart is not protected against reverse polarity, and damage from reversed connections is not covered under warranty and cannot be repaired. Then connect the input cable and torque the terminals to spec (Victron specifies 1.6 Nm).
7. Set the charging profile. Before you power anything up, set the battery type. Victron: open VictronConnect and pick the lithium preset. Renogy: hold the button and check the LED colour. REDARC: set the profile selector.
8. Fit the fuses and test. Fit the input fuse at the starter battery and the output fuse at the camper battery. Reconnect the truck battery, start the engine, and watch the charger. It should show charging within a minute.
9. Tidy up and label. Secure cables, label fuses, and tape a card with the charger settings inside the battery compartment.
Testing and Troubleshooting
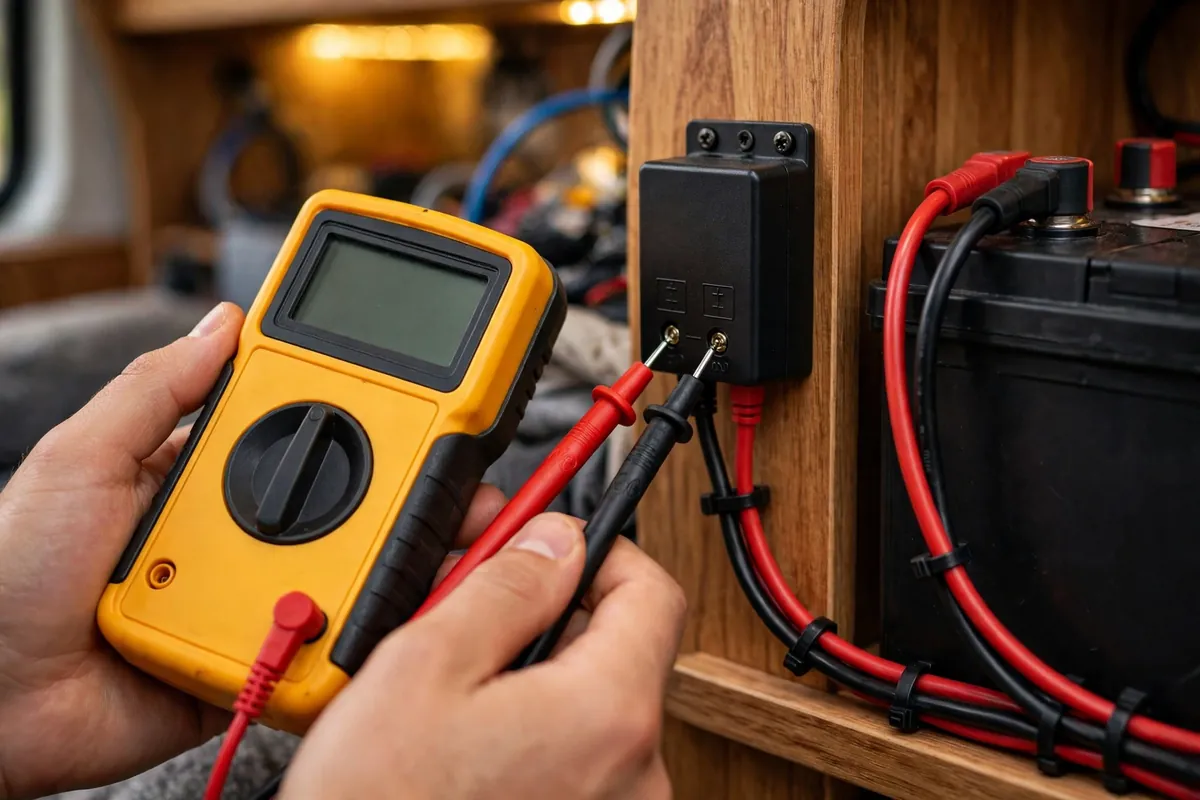
A charger that looks like it is working but delivers half its rated current is the most common post-install complaint, and it is almost always one of four things. First, check the input voltage at the charger while the engine is running. Below about 13 volts means a voltage drop problem: too-thin wire, a bad ground, or a corroded connector. Fix the wire, not the charger. Second, check whether the charger is cycling on and off. That is the smart alternator signature, so wire the ignition trigger or lower the engine-shutdown detection voltage in the app. Third, a battery at 90 percent only accepts a fraction of rated current. That is normal. Fourth, check the battery profile setting. If the battery never reaches 100 percent despite hours of driving, the charger is probably set to the wrong chemistry. My electrical troubleshooting guide covers the rest.
Common Mistakes, All in One Place
- Feeding the charger through the 7-pin plug. The wire is too small and the fuse is too small. Run a dedicated heavy cable with Anderson connectors.
- Undersizing the wire. A 25-foot run of 10 AWG loses nearly a fifth of your voltage. Use 6 AWG for a 30A charger and 4 AWG for 40A and up on a full-length run.
- Fusing at only one end, or nowhere. Fuse within 18 inches of both batteries.
- Skipping the ignition trigger on a smart alternator. The charger will cycle on and off all day and never finish the job.
- Leaving the battery profile on the default. A lithium bank charged on an AGM profile will never reach full.
- Mounting the charger somewhere hot and airless. It will derate and deliver half its rated current.
- Buying a charger bigger than the alternator can feed. Size the charger to the alternator, not to your ambitions.
Is It Worth It?
A quality 30A charger is a few hundred dollars, the heavy cable, Anderson connectors, fuses, and lugs add roughly another hundred, and a professional install is typically a few hours of labour. Some owners have been quoted two to three thousand dollars for a full lithium conversion including a rewire, which is why so many people do the DC-DC install themselves.
For me, yes, it was worth it. A DC-DC charger turned my drive days from wasted charging time into real charging time. I arrive at camp with a full battery instead of an 80-percent battery, and that 20 percent is the difference between running the fridge and the fan all evening and watching the voltage slide. My inverter install guide covers adding 120-volt power next.
Frequently Asked Questions
Do I need a DC-DC charger if I already have solar?
Yes, if you drive regularly. Solar charges when parked; a DC-DC charger charges while driving, including on cloudy days.
What size DC-DC charger do I need for a 200Ah lithium battery?
A 40A charger is the usual pick for a 200Ah bank. It charges from empty in about five hours of driving and stays within the charge limits of most 200Ah batteries. A 30A charger also works and is gentler on a smaller alternator, but takes closer to seven hours.
Why does my DC-DC charger keep turning on and off while driving?
Almost always a smart alternator. The alternator voltage drops, the charger thinks the engine has stopped, and it shuts off until the voltage recovers. Wire the ignition trigger (D+ or engine-running signal) so the charger knows the engine is running regardless of voltage. If the cycling continues, check for voltage drop in the input cable and for a loose or corroded ground.
Can I use the 7-pin trailer plug to power my DC-DC charger?
Only for a very small charger, and even then it is a compromise. The factory charge wire is typically 10 or 12 AWG and fused at 15 to 30 amps, and owners who have measured it report getting only 2 to 4 amps through it into a lithium bank.