
Truck Camper Inverter Install: How to Add 120V Power Without Killing Your Batteries
I did my first truck camper inverter install the cheap way, and I paid for it. A small modified-sine inverter, long skinny cables I already had lying around, clipped straight to the battery with no fuse anywhere near it. It ran my laptop charger — sort of, buzzing like an angry bee — and shut itself off halfway through making coffee. The cables were warm. Warm cables in a camper full of wood, foam, and propane should scare you, and that day they scared me straight.
The second install has run a microwave, a coffee maker, and a pile of chargers for three seasons without a scary moment. The difference wasn’t money — it was honest sizing, short thick cables, a fuse at the battery, and understanding the converter loop.
What a Truck Camper Inverter Actually Does
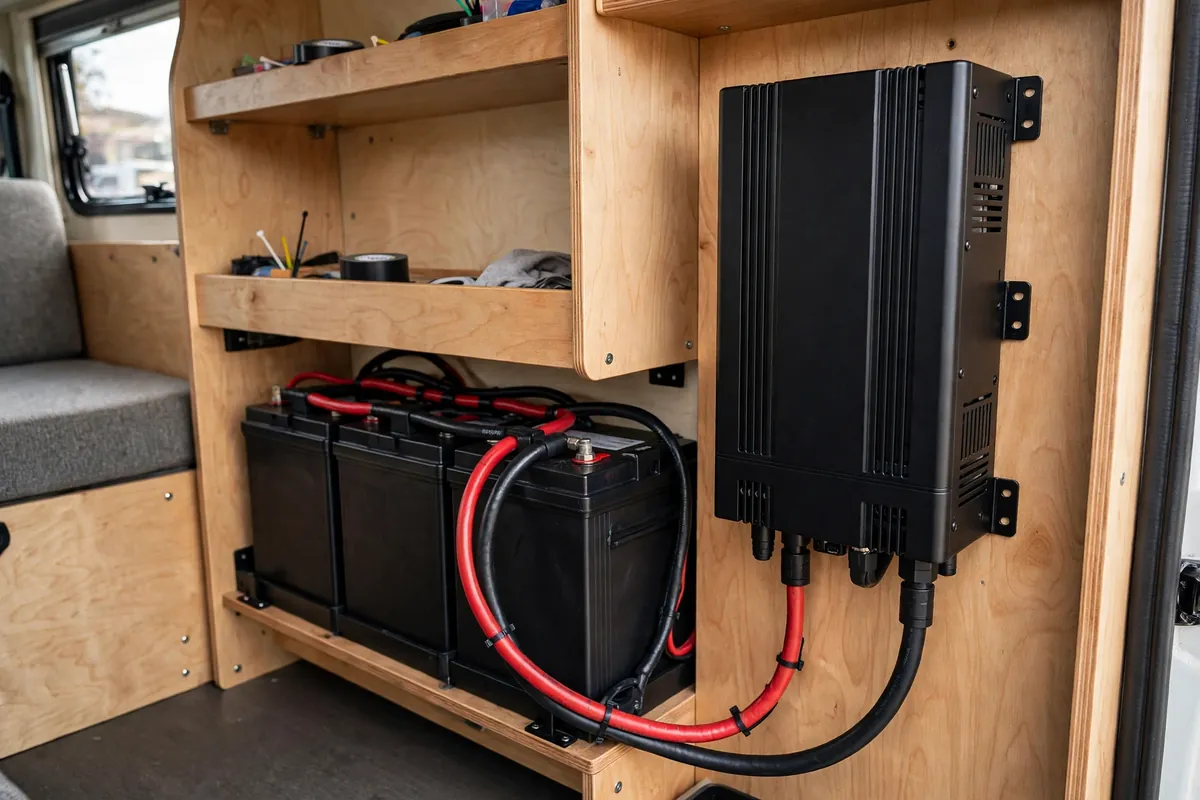
An inverter takes 12V DC from your camper’s house batteries and turns it into 120V AC, the same power that comes out of a wall socket at home. It doesn’t make power. It converts what your batteries already hold, and it loses roughly 10 to 15 percent doing it, mostly as heat.
That one fact decides everything else here. A 1,000W coffee maker doesn’t just “use 1,000 watts.” At 12V, pulling 1,000W through an inverter means roughly 95 amps out of your batteries once efficiency losses are counted. Ten minutes of it uses about 16 amp-hours. The inverter is the easy part. The battery bank behind it is the real limit.
An inverter doesn’t replace shore power or a generator — it’s for short jobs off-grid, and our air conditioning guide is honest about what each option can actually do.
How to Size Your Inverter

Don’t size for everything you own. Size for everything you’ll run at the same time. My real list, not my fantasy list: laptop charger 60–90W, phone and camera chargers 20–40W, CPAP 30–90W, coffee maker 600–1,200W, microwave 800–1,500W, toaster 800–1,200W, drill charger 100–300W.
Add up your simultaneous loads, then add 20 to 30 percent headroom. Check surge ratings: anything with a motor or compressor can pull two to three times its running watts for a few seconds at startup. A coffee maker that peaks at 1,000W when the element kicks in needs a 2,000W inverter to handle it without tripping — exactly the lesson one campervan owner documented online after sizing to running watts and watching the inverter shut down every morning.
For most truck campers, a 2,000W pure sine wave inverter is the sweet spot: a microwave or coffee maker one at a time, plus chargers, without drama. A 1,000W unit is fine for charging devices and a small TV; a 3,000W unit is for big lithium banks — on 12V, that’s about 290 amps, a different wiring conversation.
One more trap: a microwave’s box says “1,000W” and means cooking output — the power it draws is usually 1,400 to 1,600W, so size to the draw on the back label.
Pure Sine vs Modified Sine: Spend the Extra Money
This is the one place I’ll tell you not to cheap out. A pure sine wave inverter produces smooth AC power, essentially identical to your wall at home. A modified sine wave inverter produces a stepped, blocky approximation. It’s cheaper, and it runs simple things — a basic heater element, an old drill — fine. But owners on Reddit and RV forums report the same problems with modified sine over and over, and the RV wiki’s inverter page collects them: laptop chargers that buzz, run hot, or refuse to power on; cordless tool battery chargers — DeWalt and Milwaukee get named repeatedly — that won’t charge or get damaged; motors that run hotter and noisier; and microwaves that run roughly 20 percent less efficiently and at lower power on modified sine.
My first inverter was modified sine: my laptop charger hummed and my drill charger refused to work. For a permanent install powering anything with a circuit board — in 2026, basically everything — pure sine is the correct choice. Buy pure sine once and be done with it.
The Battery Reality Check (Do This Before You Buy Anything)
A 2,000W inverter at full load pulls roughly 195 amps from a 12V battery bank. That’s not a typo. A single 100Ah lead-acid battery gives you about 50 usable amp-hours, which means a microwave at full draw would flatten it in about fifteen minutes — before the inverter’s low-voltage alarm starts screaming.
Be honest about your bank before you order anything:
- One 100Ah lead-acid battery: laptops, phones, TV, CPAP. Forget the microwave.
- Two 100Ah lead-acid (200Ah total, ~100Ah usable): short microwave or coffee runs, one at a time.
- 200Ah of lithium (LiFePO4): the realistic minimum for regular microwave and coffee use.
- 300Ah+ lithium: comfortable daily inverter cooking, if your charging can keep up.
Charging matters as much as capacity: an inverter that drains 100Ah in a morning needs that 100Ah put back. Our solar and lithium sizing guide walks through matching panels, batteries, and charging so the system balances.
Wiring and Fusing: Where Installs Actually Fail
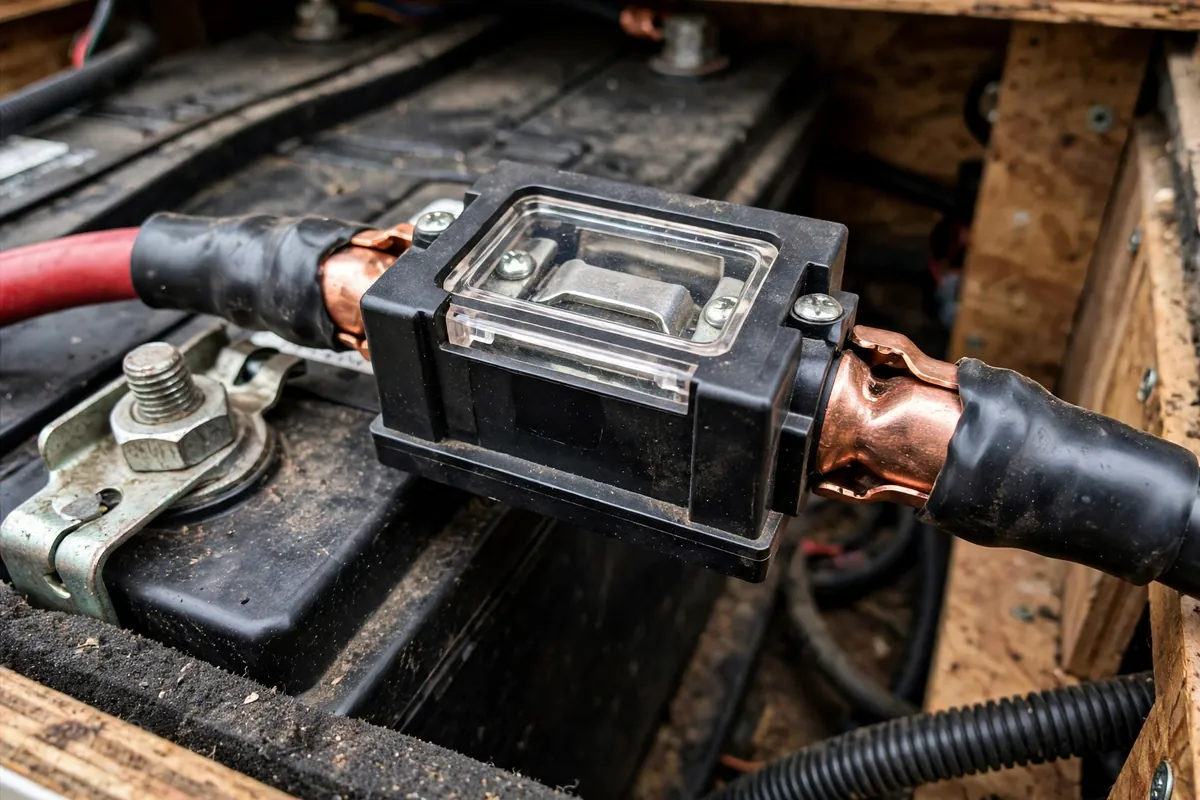
Almost every inverter horror story in owner forums comes down to wiring, not the inverter itself.
Keep the cable run short. Mount the inverter within a few feet of the batteries. Every extra foot of DC cable at 150-plus amps costs voltage, and voltage drop makes an inverter shut down under load even when the batteries are fine. Owners on a truck forum argued this out in detail: one running undersized cable watched his fuse holder brown, melt, and blow — the wiring was the problem, not the fuse. Another put it bluntly: never skimp on wire size, because he’d rather replace a cheap fuse than a camper.
Use thick cable. For short runs on 12V, think 4 AWG for 1,000W, 1/0 AWG for 2,000W, and 2/0 or larger for 3,000W — and check your inverter manual first, because it overrides any table in a blog post, including this one. Use proper copper cable with crimped lugs.
Fuse the positive cable at the battery, as close to it as you can get. This fuse protects the cable, not the inverter: if that cable ever chafes through and shorts to the frame, the fuse is the only thing between you and a fire. A 2,000W inverter typically needs a 200 to 250 amp fuse, and many owners recommend a Class-T fuse for larger banks because of its high interrupt rating.
The negative cable matters just as much: same size as the positive, every connection clean, tight, and heat-shrunk.
Never wire a big inverter to your truck’s starter battery. The house batteries feed the inverter, always — a starter battery isn’t designed for deep discharge, and draining it leaves you stranded.
Where to Mount the Inverter
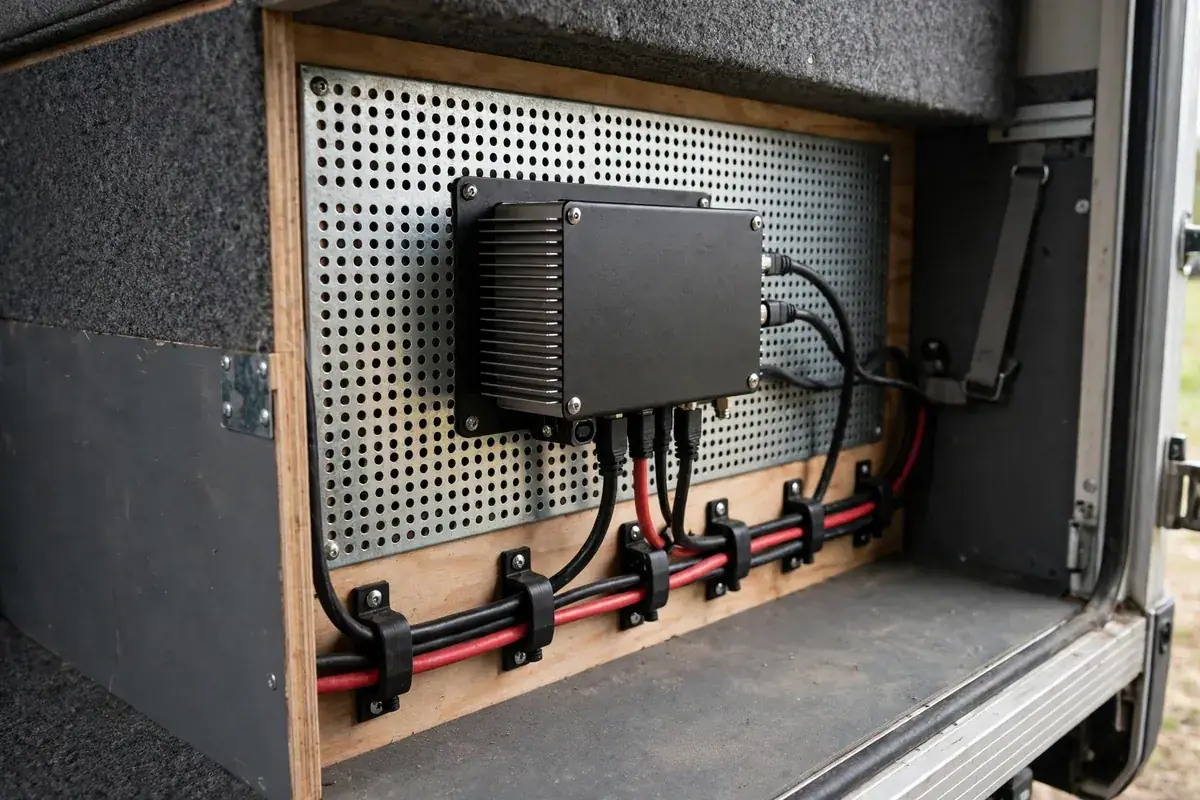
Pick the spot before you buy cable, because the spot decides the cable length. Close to the batteries (a few feet, not across the camper), dry and ventilated — inverters make heat and their fans need air, so don’t bury one in a sealed compartment, and never in the same sealed compartment as flooded lead-acid batteries, which can vent hydrogen. Make sure you can reach the on/off switch, see the fault lights, and get at the fuse without dismantling furniture. Mine lives in a vented compartment right next to the battery box, screwed down solidly.
The Step-by-Step Truck Camper Inverter Install
Read your inverter’s manual first — it wins over anything here if there’s a conflict.
Step 1 — Plan and measure. List your loads, pick your inverter size and mounting spot, measure the cable route, and note the fuse size from the manual. Gather everything first: inverter, cable, lugs, crimper, heat shrink, fuse and holder, disconnect switch, and clamps.
Step 2 — Disconnect the batteries. Negative first, then positive. Cover the terminals so nothing can touch while you work, and unplug from shore power.
Step 3 — Mount the inverter. Screw it down firmly in the orientation the manual specifies, with the airflow clearances it asks for.
Step 4 — Run and crimp the DC cables. Route positive and negative from battery to inverter, clamping them so they can’t chafe on sharp edges. Use a proper lug crimper — not pliers, not a hammer — and heat-shrink every lug.
Step 5 — Fit the fuse on the positive cable, close to the battery. Non-negotiable. A disconnect switch goes on the positive side too, so you can kill the whole circuit for storage. Test that it actually kills it.
Step 6 — Connect to the batteries. Negative to negative, positive to positive through the fuse. Tighten properly and check with a multimeter that you’re seeing full battery voltage at the inverter terminals.
Step 7 — Wire the AC side. Three options: the inverter’s built-in outlets with extension cords (simplest, no camper wiring touched); one or two dedicated, clearly marked inverter outlets; or into the AC panel through a transfer switch so existing outlets work off-grid. Option three is the most convenient and the most dangerous to get wrong.
Step 8 — Test small first. Phone charger, then a lamp, then your laptop. Only then try the coffee maker or microwave, watching battery voltage. If it shuts down on a load it should handle, suspect voltage drop before blaming the inverter.
Step 9 — Label everything. Outlets, fuse size, disconnect switch. Stick a note in the battery compartment with the fuse rating and cable size. Future-you, troubleshooting at midnight in the rain, will be grateful.
The Transfer Switch and the Converter Loop
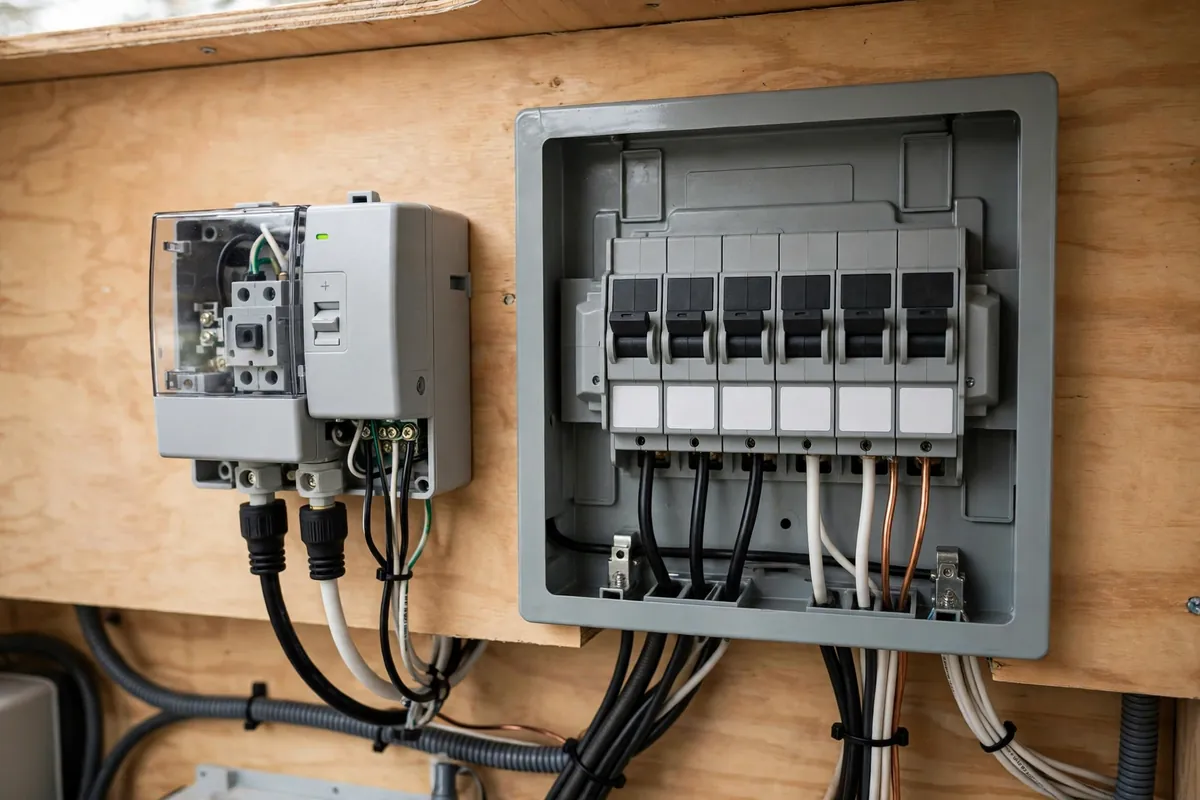
This is the trap that catches first-timers, and owner forums are full of people who walked into it. Your camper has a converter — the box that turns 120V shore power into 12V to charge your batteries. If you plug your camper’s shore-power cord into your inverter without dealing with the converter, the inverter powers the converter, the converter tries to charge the battery, and the battery feeds the inverter. You’re charging the battery from itself, losing 10 to 15 percent on every lap, and your batteries drain fast while accomplishing nothing. Owners on the Forest River forums call it a “death cycle,” and on iRV2 a Lance owner got the same warning from several experienced members: isolate the charging device, or you’ll create a loop.
An inverter/charger with a built-in transfer switch is the easiest proper fix — Renogy’s 2,000W inverter-charger, for example, switches between shore power and battery power automatically in about 10 milliseconds, and the charger is managed internally so the loop can’t happen. Their 2,000W inverter with a built-in transfer switch does the same for the inverter-only route.
A separate automatic transfer switch also works: it feeds your outlets from shore power when available and from the inverter when not, and the two sources can never meet — just keep the converter on the shore-power side only, or on its own breaker you switch off. The manual approach is cheapest and fine if you’re disciplined: dedicated inverter outlets, or plugging the shore cord into the inverter only after switching the converter’s breaker off. One forum member runs a sub-panel with only the outlets he wants on inverter power, with the air conditioner and converter left out.
Never back-feed the inverter output into the shore-power inlet with a homemade adapter and no transfer switch. That’s how inverters get destroyed and, in the worst case, how someone working on the pedestal gets hurt.
What Not to Run, and the Habit That Kills Batteries

Don’t run the roof air conditioner off a 2,000W inverter on a normal camper battery bank — the startup surge and sustained draw will flatten the bank in well under an hour. Electric space heaters, hair dryers, and kettles are the same: technically possible for a few minutes, ruinously expensive in battery terms. Our generator vs solar comparison is useful here, because some of these jobs genuinely belong to a generator, not an inverter.
Then there’s the habit that quietly kills more batteries than any appliance: leaving the inverter switched on. An inverter draws power even with nothing plugged in. Owners on iRV2 have documented this in painful detail: one found his inverter in standby pulled enough over a week in storage to use 250 to 300 amp-hours, while the same setup in hibernate mode used only about 55. The fix the forum settled on was switching it fully off, using its search or eco mode, or running a small 500W inverter for overnight phone and CPAP duty and leaving the big one off. My rule now: the big inverter is on only when I’m actively using AC power.
An inverter that “turns itself on” in storage isn’t haunted — it’s usually a remote switch, an auto-start setting, or a control panel keeping it alive. If your batteries are dead after a week parked, check the inverter first. A battery disconnect switch at the bank is the surest fix, because some inverters connect directly to the batteries and bypass the camper’s main battery switch entirely. And if your inverter alarms on a load it handled last week, check battery charge first, then connections — our electrical troubleshooting guide covers the checks that sort most of them out.
The Mistakes That Cost Owners the Most
The short list: buying the inverter before sizing the battery bank; undersized cable and no fuse at the battery; modified sine to save money; the converter loop; leaving the inverter on overnight or in storage; and wiring to the starter battery. Get those six right and the rest is detail.
FAQ: Truck Camper Inverter Install
What size inverter do I need for a truck camper? For most campers, a 2,000W pure sine wave inverter covers a microwave or coffee maker one at a time plus chargers. Size it to the loads you’ll run simultaneously, add 20 to 30 percent headroom, and check your bank can deliver the current — a 2,000W inverter pulls roughly 195 amps at full load on 12V.
Can I install a truck camper inverter myself? The DC side — mounting, cabling, and fusing — is a careful DIY job if you’re comfortable with tools and follow the manual. The AC panel and transfer-switch work is where most people should get a professional.
Pure sine vs modified sine — does it really matter? Yes, for a permanent install. Modified sine can make laptop chargers buzz or overheat, stop some cordless tool chargers from working, and run motors and microwaves less efficiently. Pure sine works with everything.
Will an inverter drain my camper battery overnight? It can. Even with nothing plugged in, an inverter draws standby power, and owners have measured large draws over a week in storage. Switch it fully off when not in use, use eco or search mode if yours has it, or run a small inverter for overnight low-power loads.
Can I run my air conditioner off an inverter? Not practically on a normal truck camper setup. The startup surge and sustained draw will empty a typical battery bank very fast.
Do I need a transfer switch? If the inverter will power your camper’s existing AC outlets, yes — a built-in transfer switch in an inverter/charger, or a separate automatic transfer switch. Without one, you must manually keep the inverter output and shore power apart, and keep the converter from charging the battery off the inverter.
What size fuse do I need for a 2,000W inverter? Typically a 200 to 250 amp fuse on the positive cable, mounted as close to the battery as possible — but follow your inverter manufacturer’s manual, because it overrides general guidance.
A Quick Word on Safety
I’m an experienced owner, not an electrician, and this guide is not a substitute for your inverter’s manual or local electrical codes. High-current DC wiring can start a fire if it’s undersized, unfused, or loose, and 120V AC can kill you. If any part of the AC-panel or transfer-switch work is outside your comfort zone, pay a qualified RV or auto electrician to do that part — it’s a few hundred dollars against a camper that costs tens of thousands. If anything smells hot, looks melted, or trips repeatedly, stop using it and find the cause first.
Done right, a truck camper inverter install is one of the best upgrades you can make. The inverter didn’t give me more power — it just let me use the power I already had, in the form I actually needed.